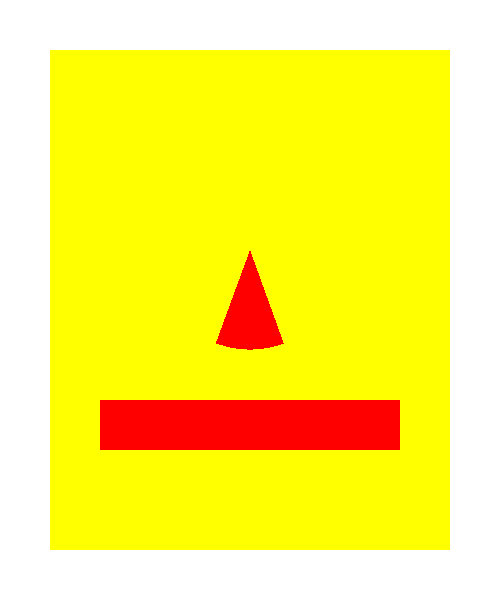
You need to modify the paint() method of the
Face class to produce an improved face. (Ah,
if all of life were so easy.) You are expected to be creative, both
in designing the face and in using Java classes. Look at Sun's
documentation for the Color
and Graphics
classes to see what colors and graphic objects are available. You
might also find your textbook to be useful.
Understanding the Documentation
Take a look at
Sun's on-line documentation
for the fillArc method of Graphics.
Everything we needed to know to draw that nose is located in
this information. You just have to read and understand it.
So give it a try!
(By the way, reading and understanding documentation is a
major part of the work life of a computer professional.)
In order to use the methods defined in the Graphics
class, you need to remember how the display coordinate system is
setup. The origin of the coordinate system is the top-left corner of
the display, with the positive x-axis running horizontally
to the right, and the positive y-axis running vertically
down (not up) the right side of the display. Also, distances
are measured in terms of pixels, the little dots that make up
your screen.
Remember, the order in which the objects are drawn to the screen
makes a difference. If you want to draw a black pupil in
the center of a green iris, you must draw the surrounding iris first.
Some examples from the past
Your Assignment ...
This lab has more flexible rules than the others. However,
it has few definite rules:
-
You are strongly encouraged to work with a partner.
-
You must use at least one color not seen in the original
Face.java code.
-
You must use at least two additional methods
of from the Graphics object. We suggest you
choose fillOval() for one of your two.
-
Your Java-generated face must not resemble that of your lab instructor.
Going public (OPTIONAL)
Obviously, you want to show the world your creation.
You can do this by FTP'ing your compiled Java code and
your HTML file to your UNCA web page on bulldog.
This requires a few steps, but we're certain you're
up to the challenge. Just go back to a terminal screen
and type the following commands:
[csciuser@mach dir] cd ~/csci/201/Face
[csciuser@mach dir] ftp bulldog.unca.edu
Trying 152.18.16.9...
Connected to bulldog.unca.edu (152.18.16.9).
220 bulldog.unca.edu FTP server (Compaq Tru64 UNIX Version 5.60) ready.
Name (bulldog.unca.edu:csciuser): bulluser
331 Password required for bulluser.
Password: type your bulldog password here, it will not be echoed
230 User bulluser logged in.
Remote system type is UNIX.
Using binary mode to transfer files.
ftp> cd public_html
250 CWD command successful.
ftp> put Face.class
local: Face.class remote: Face.class
227 Entering Passive Mode (152,18,64,9,NN,NN)
150 Opening BINARY mode data connection for Face.class (152.18.69.NN,NNNN).
226 Transfer complete.
NNN bytes sent in XXX secs (XXX Kbytes/sec)
ftp> put Face.html
local: Face.html remote: Face.html
227 Entering Passive Mode (152,18,64,9,NN,NN)
150 Opening BINARY mode data connection for Face.html (152.18.69.NN,NNNN).
226 Transfer complete.
196 bytes sent in XXX secs (XXX Kbytes/sec)
ftp>quit
221 Goodbye.
Remember, you type the words in maroon.
Since you are transfering into your bulldog account,
you must use your bulldog password and user id
(in place of "bulluser").
Once you've done the file transfer, go to your web browser and
try to load the URL
http://bulldog.unca.edu/~bulluser/Face.html.
If this results in the display of the message "You are not authorized
to view this page", you need to log into bulldog.unca.edu
and run the command openhomepage. A bit more information
about this procedure is explained in the
CSCI 107 -- Introduction to HTML lab description.