home | homework index | labs index
|
|
CSCI 201
Introduction to Algorithm Design home | homework index | labs index |
SPRING 2007 |
After completing the lab in which you used Java to construct a face, you might wonder if there any GUI-based programs to help you with this task. The answer is: "sort of". NetBeans does have a forms constructor that helps you to layout buttons and text fields, though this doesn't really help a lot with "pure" graphical program in which you are placing rectangles and ovals on the screen.
We're going to show you how to use the forms constructor today, because it's often a quick solution for rapid prototype development and sometimes even a little fun (though a bit frustrating on the first use). Our goal is to produce something like the following Applet which you might have found useful for picking out odd colors for those faces.
Although the forms creator will automate a great deal of the process of creating a GUI application, there are lots of steps which most be precisely followed to succeed in this project. Read the lab description very carefully as you proceed through the project. If you plunge ahead, you will be lost.
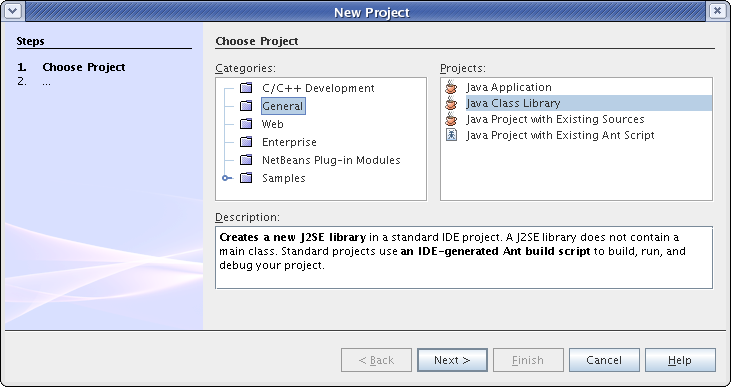
Start by creating a new project.
Today when you choose the project, select a
Java Class Library
within the General category.
Do not choose Java Application
as you have for previous labs.
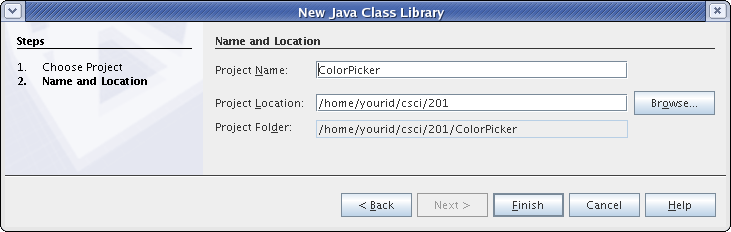
Call your project ColorPicker
and store it within your
csci/201 directory,
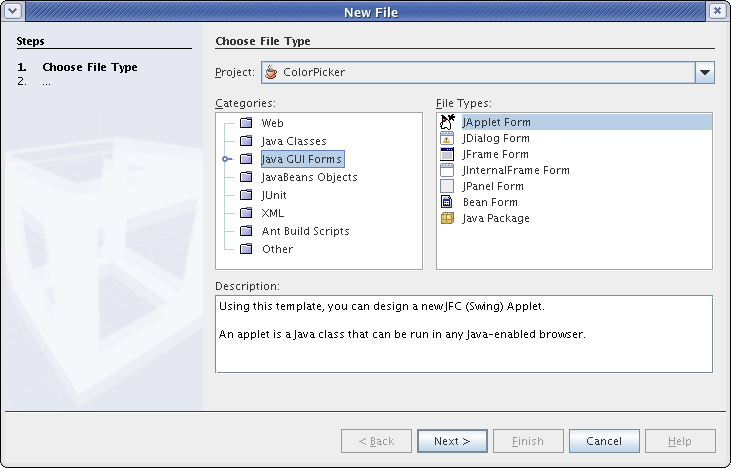
Using the
File
→ New File....
menu sequence,
create a Java file by selecting the category
Java GUI Forms
and the file type JApplet Form.
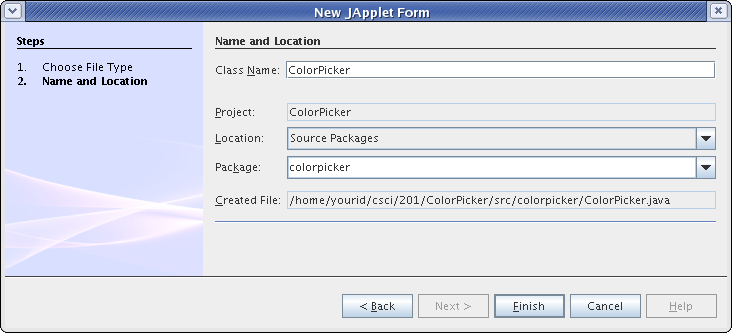
Name your class ColorPicker and place it in the
colorpicker package.
When you select the ColorPicker.java
file from your Projects,
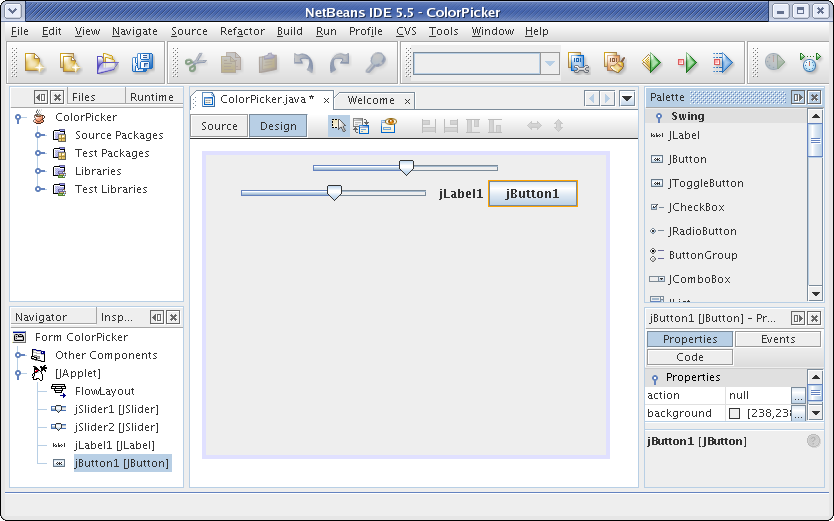
you should see a NetBeans window
with no less that five panes.
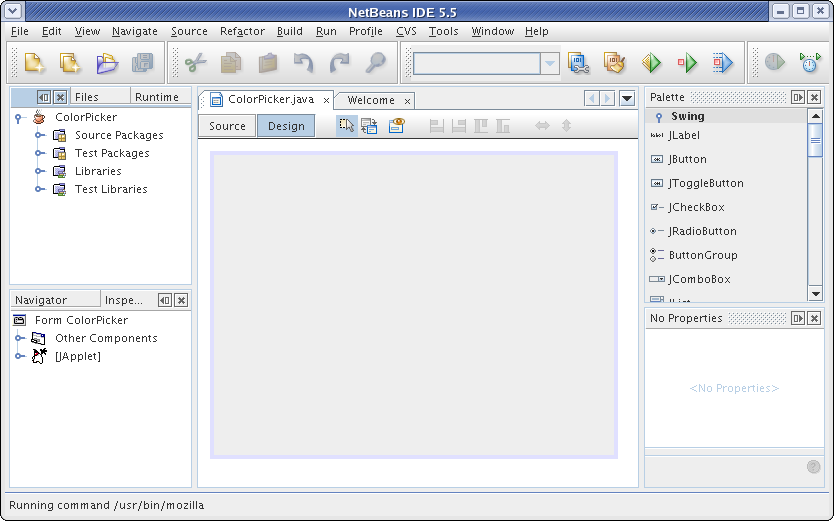
In the upper-left is the familar Projects panel, which we're going to ignore this week.
In the lower-left is a tabbed panel where you can choose between Navigator and Inspector. Choose the Inspector view and leave it there. You'll be using Inspector quite a bit today.
Lower-right is a properties panel. Right now it's empty, but in a few minutes you'll be using it to specialize the elements of your graphical interface.
In the upper-right corner is the Palette. You'll be selecting GUI elements from the Palette and placing them into your Applet window.
Finally, at the very center you see ColorPicker.java. Notice that it has two tabs: Source and Design. The Source view is for pure Java coding. The Design view is for drop-and-drag GUI development. We'll start in Design and later switch to Source.
Java frames and panels have layouts which control how they
display their collections of buttons and sliders.
We're going to set the layout to FlowLayout.
That's really a rather feeble layout, but it is good enough to
get us through this lab.
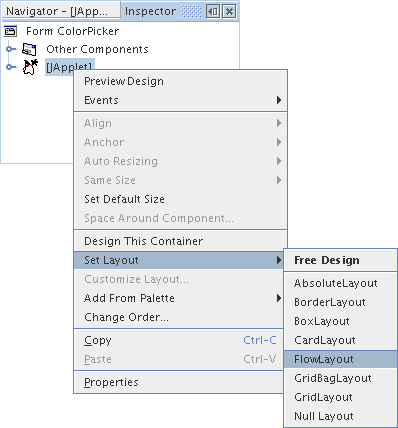
Go into the Inspector panel and
right-click on [JApplet].
If you don't see the Inspector panel tab,
you need to make sure Design is
selected in the middle panel.
Next go through the menu choices
Set Layout →
FlowLayout.
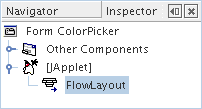
Wasn't that exciting. The only change you should notice
is in the Inspector panel.
Now we're going to place some stuff on the panel.
First up is a JSlider.
Go into the Palette
and press down on
JSlider
and move it over into your Drawing window.
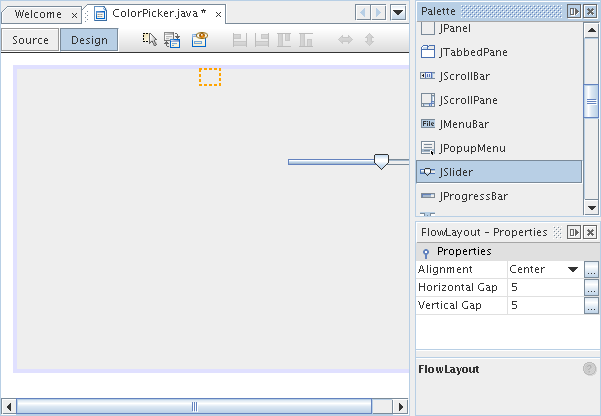
Wow! A little sliding bar appears on the canvas.
One down and three to go.
Now add, in order, another jSlider and then
a JLabel
and finally a JButton.
The JLabel and
JButton
are near the top of the Palette.
If you look at the Inspector,
you'll notice that your buttons and sliders have rather
cryptic names like JSlider2.
This could become rather confusing.
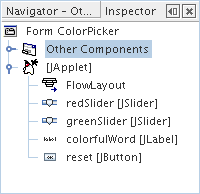
The sliders will control the red and green components of a
displayed color. Rename them to something reasonable
like redSlider and greenSlider.
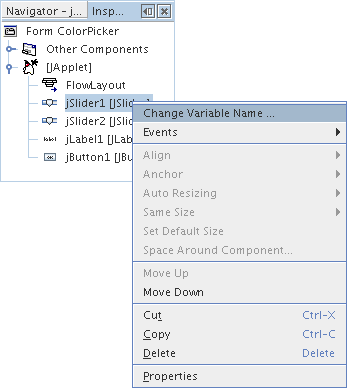
Do this by right-clicking on the component name within
the Inspector panel
and then choose Change Variable Name...
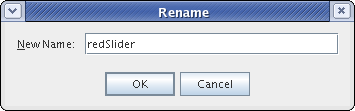
from the menu. Next, type the new variable name in the
Rename window.
We're going to use the jLabel to display a
word in different colors. So
rename it to something reasonable, like colorfulWord.
Since the jButton resets the color,
rename it to reset.
When you are done, your
inspector window should resemble the following:
Go ahead and run your Applet by right-clicking on
ColorPicker.java
and choosing Run File.
Resize the Applet window and notice how the components jump wildly around.
That's because you are using the FlowLayout manager.
Fortunately, you can fix the Applet size in an HTML file and avoid
this problem.
This is what we have done in the Applet below.
You'll notice that you can also move the sliders and press the button, but nothing happens. It will be a while before anything does.
Your computer monitor displays each pixel by mixing red, green, and blue. The intensity of the red, green, and blue is described as a number from 0 to 255. A color can them be characterized as a triple of the red, green, and blue intensities, in that order. Consequently [255, 0, 0] is a pure red and [0, 255, 0] is a pure green.
The mixtures required to generate other common colors can be a bit puzzling for those of us who learned to mix red and yellow to get orange in elementary school. For example, yellow is [255, 255, 0] a mixture of red and green at their full intensities. Orange is something like [255, 144, 0]. If you want to find out the official color names of the MIT Xconsortium take a look a the RGB to Color Name Mapping page of Kevin Walsh.
Stop your applet from running and go back to your panel.
It's time to worry about colors and fonts. This part is pure
GUI, but it takes a while the first time you try it.
Your first job will be customizing redSlider.
Go back to the Inspector
panel and click on redSlider.
If you look at the Properties
pane, you will see that it now has a display of various properties
you may set for the JSlider named redSlider.
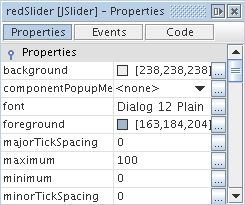
Properties specialize the display of a component. The names of properties are in the left column. The values of properties are in the right. You can change a property's value by typing directly into the value fields or by clicking on the three little dots at the left end of the property's row.
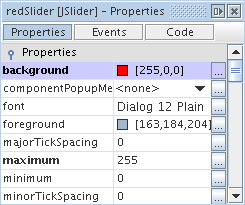
Change the background for
redSlider to [255, 0, 0], and change
the maximum to 255
because color intensity ranges from 0 to 255.
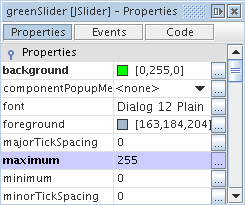
Now click on greenSlider in the
Inspector panel.
GreenSlider also needs a
maximum of 255,
but its background
should be [0, 255, 0].
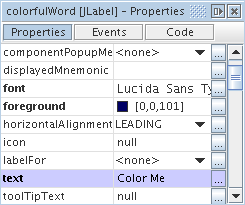
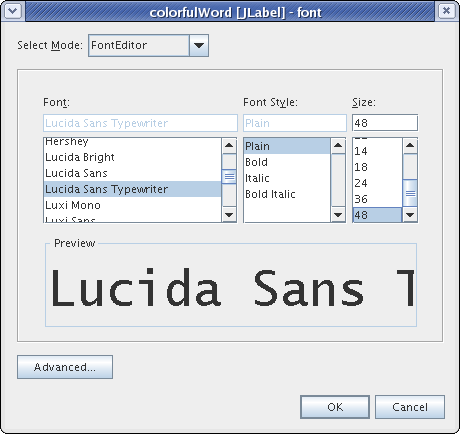
colorfulWord needs a change of font,
foreground, and
text.
By the way, you really don't have to make all the same choices we do.
To change the font, double-click on the three little dots at the end of
the row for font. This will bring up
a font selection window.
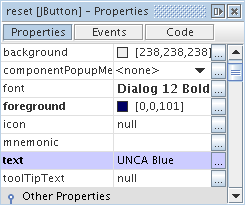
For reset, change the
foreground and
text.
Run your Applet a second time. This time you have pure vaporware.
It looks pretty. The sliders slide and the buttons butt, but
nothing happens.
Remember, you may need to resize the running applet's window to
align the four components vertically.
NetBeans has been silently generating Java code for you. Press that Source tab in the ColorPicker windows and you'll see about 65 lines of Java code. Scroll through the code and see where your components are created and specialized.
If only your program did some work.
Whenever you press a button in Java or move a slider, an event
is generated. For example, when you perform a mouse click on
a button, a MouseEvent is generated.
It is possible to intercept these events and have them
delivered to methods in your code.
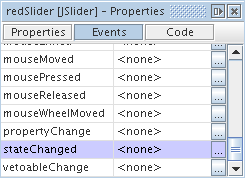
Go back to the Inspector panel and click on redSlider. Now go over to the Properties panel and mash the button labeled Events.
Work your way down to the row with the event
stateChanged. This
event is invoked whenever the slider bar is moved.
Press on the box within that row
labeled <none>.
You should see the contents of the box change to
redSliderStateChanged.
The transformation is shown in the following two panel snapshots.
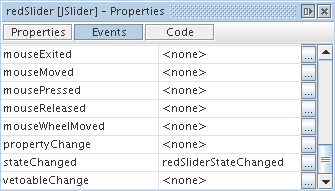
Now hit the Enter key to accept the change.
This will immediately flip you over to the Java
Source panel.
Notice that NetBeans has created the header for a new
redSliderStateChanged method for you.
It's also set up event handlers so that
redSliderStateChanged will be called whenever
the red slider is moved.
At this time, the method is empty, but we'll fix that in a minute.
    private void redSliderStateChanged(javax.swing.event.ChangeEvent evt) {
// TODO add your handling code here:
    }
Generate one of these
handlers for stateChanged
for greenSlider.
ColorfulWord pays no attention to events, but
reset does.
Create an empty mouseClicked
event handler for reset.
Your Java program should now contain three event handlers like those shown below. If it doesn't, call the lab instructor.
    private void resetMouseClicked(javax.awt.event.MouseEvent evt) {
// TODO add your handling code here:
    }

    private void greenSliderStateChanged(javax.swing.event.ChangeEvent evt) {
// TODO add your handling code here:
    }

    private void redSliderStateChanged(javax.swing.event.ChangeEvent evt) {
// TODO add your handling code here:
    }
Finally it's time to type some Java code. Notice that some Java statements have a light blue background. These you may not modify. They can be changed only through the Design panel.
However, we must modify some of the Java code within the white background
to get our program to do anything.
For example, if we press the UNCA Blue
button, we want to change the color of
Color Me to be UNCA blue,
[0, 0, 101]. That's pretty easy. All we need do is
call the setForeground method of colorfulWord.
Here's the code to do this.
    private void resetMouseClicked(java.awt.event.MouseEvent evt) {
        java.awt.Color newColor = new java.awt.Color(0, 0, 101) ;
        colorfulWord.setForeground(newColor) ;
    }
We also need to handle the slider events. This code is
much more complicated.
First, we obtain the present foreground color of
colorfulWord and store it in a
Color variable called oldColor.
Next, we create a new Color variable
called newColor. These two Color
variables will differ only in the intensity of their red
component.
Notice how we get the red intensity from redSlider,
but we get the green and blue intensities from
oldColor.
Finally, we set the foreground color of
ColorfulWord to newColor.
Here's the new code for RedSlider.
    private void RedSliderStateChanged(javax.swing.event.ChangeEvent evt) {
        java.awt.Color oldColor = colorfulWord.getForeground() ;
        java.awt.Color newColor = new java.awt.Color(
                                     redSlider.getValue(),
                                     oldColor.getGreen(),
                                     oldColor.getBlue()
                                  ) ;
        colorfulWord.setForeground(newColor) ;
    }
Carefully study this code.
The Color constructor takes three arguments,
the red, green, and blue intensities, and yields a new color.
The red intensity is taken from the slider, and the green and
blue intensities are taken from the present color.
Later on you'll have to add, within greenSlideStateChanged,
the Java code to change the green intensity. In that case,
the green intensity will come from greenSlider,
but the red and blue intensities will come from colorfulWord.
Remember RGB, red, green, and blue.
The arguments to the Color constructor must
always be given in that order.
Go ahead and modify your program to handle movements of
both sliders and presses of the button.
Your code should work something like the following Applet.
Of course, the obvious shortcoming of the Applet is that it doesn't have
a slider for the blue component. Add one. Remember, you'll have
to add a slider, rename it,
set its properties, and program a StateChanged
handler.
Your improved Applet should mimic the one shown below.
Rapid prototypes frequently have minor "bugs". Not surprisingly so does ours.
Its sliders don't always agree with the displayed color.
In particular, even though the initial color is [0, 0, 101],
the sliders are displaying [50, 50, 50].
Even worse, when you press the UNCA Blue
button, the color of the Color Me
label changes, but the sliders do not.
Fix these bugs so that your Applet works like the one below.
If you have to use the getValue method to get the value of
a slider, guess what method is used to set the value?
Last modified: 04/02/07