In this lab you will finish a Java GUI application demonstrating the functions of a hash table. This type of data structure is well suited for efficient storage and retrieval of data identified by an associated key. For example, a data record describing a student or an employee could be uniquely identified by the person's Social Security number (the key in this case). If records of this type are stored in a hash table, they can later be quickly found and retrieved by specifying the key.
To make a hash table as generally useful as possible, they can be defined to accept so-called (key, value) pairs. Here the key serves as a unique identifier for the associated value or data to be stored and/or retrieved. For maximum generality in Java applications, both the key and the value can be defined be of type Object. The only requirements on the key type are that it provides an equals() method, and also a method called hashCode() which will be discussed in detail below. But it turns out that the Object class provides implementations of both these methods.
As it happens, the standard Java platform provides a data structure of this type, namely the class Hashtable in the package java.util. Later in this course you will learn more about this standard class. For this lab, however, you will be asked to complete a simple implementation of a hash table, in the form of an array of linked lists. This "home-grown" class will also be named Hashtable, and it will be designed so that it provides a subset of the API for java.util.Hashtable. Thus you should actually be able to use either of these two implementations in this demo application and observe the same behavior.
The GUI framework and the graphical representation of the Hashtable have already been written for you. In addition, the lab07.List class you developed in Lab 07 will be used to provide the individual linked lists in the table. In fact your only task will be to complete a Hashtable class definition by implementing several stubbed methods.
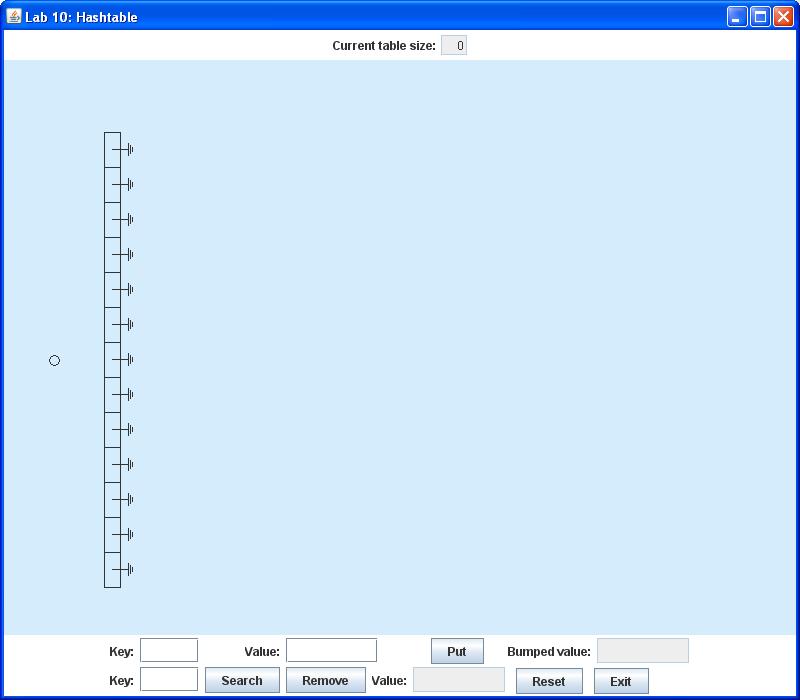
This application initially displays an array of null links representing empty List objects, as shown below:
The small circle to the left of the List array represents the hash function, which accepts the key in a (key, value) pair as its input. The function uses the key to compute and return an integer called the hash value, which in this implementation serves as an index into the array of List instances. This identifies the particular List in the array where this (key, value) pair is to be stored. The same hashing technique is also used to determine which List must be searched to retrieve, update, or remove the value associated with that key. Note that as defined here, the key must be unique. In other words, at most one pair containing a given key can appear in the table. However, there is no such restriction on the values (multiple keys may be associated with the same value).
Each time a key is hashed, the display will show a line drawn from the circle to the appropriate array component. Thus if you use the topmost row of the control panel to insert an arbitrary pair of strings as a (key, value) pair, say for example (k32, Tom), the display should appear as follows:
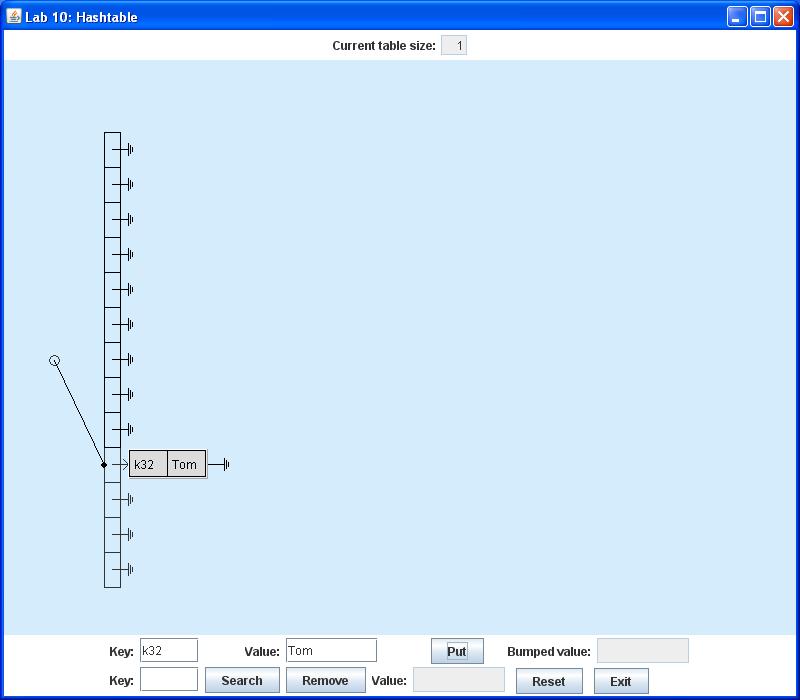
Here each node shows the (key, value) pair in its data compartment. Of course both the keys and values chosen here are completely arbitrary. Note that for this demo application it is best to use short strings for both the key and value, so that each fits completely within the node.
If you go on to insert (k21, Ben), (k68, Tina), (k25, Sally), (k47, Jim), and (k19, Ben), you should see
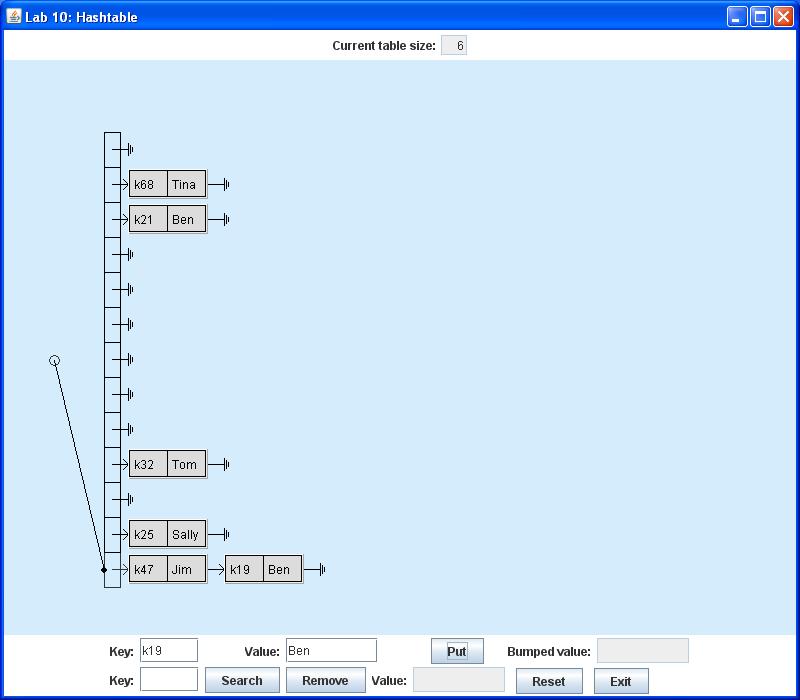
Note that by this time two distinct keys have generated the same hashvalue, since two (key,value) pairs are now stored in the bottommost List. This is bound to happen in some cases, but the whole idea of hashing is to scatter the values as uniformly as possible among all the lists in the array. In real applications you might have to override the hash function to achieve optimal scattering of the values. However, for this lab we will simply use the version defined by the Object class.
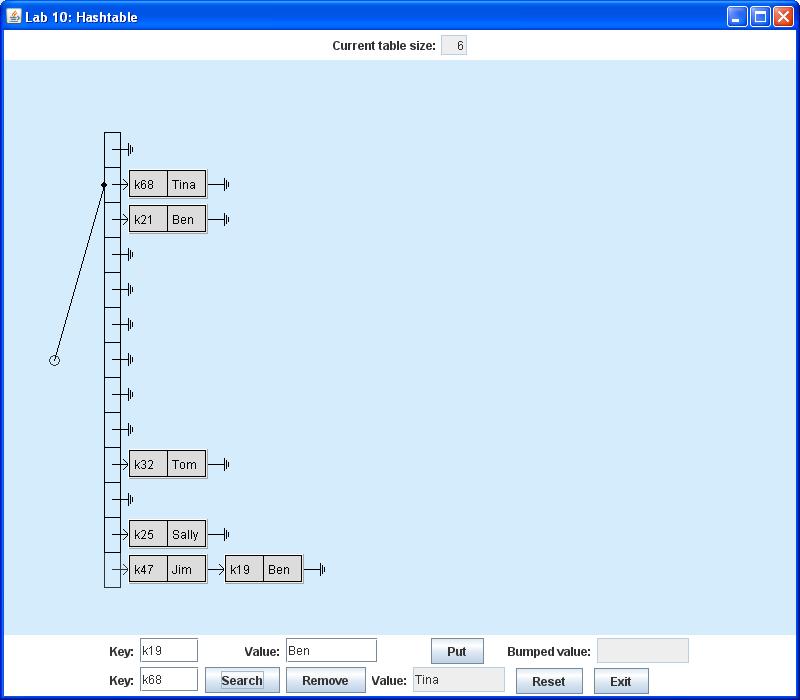
The second row of the control panel may be used either to search for or remove the value associated with a specific key. Thus if you enter the key k68 and press the Search button, the associated value Tina will appear in the text box labeled Value as shown below:
If you press the Remove button instead of the Search button, you will remove the node containing the (key, value) pair from the table. Thus if you enter the key k19 and press Remove, the node containing (k19, Ben) will disappear from the display. The removed value Ben appears in the text box labeled Value as shown below:
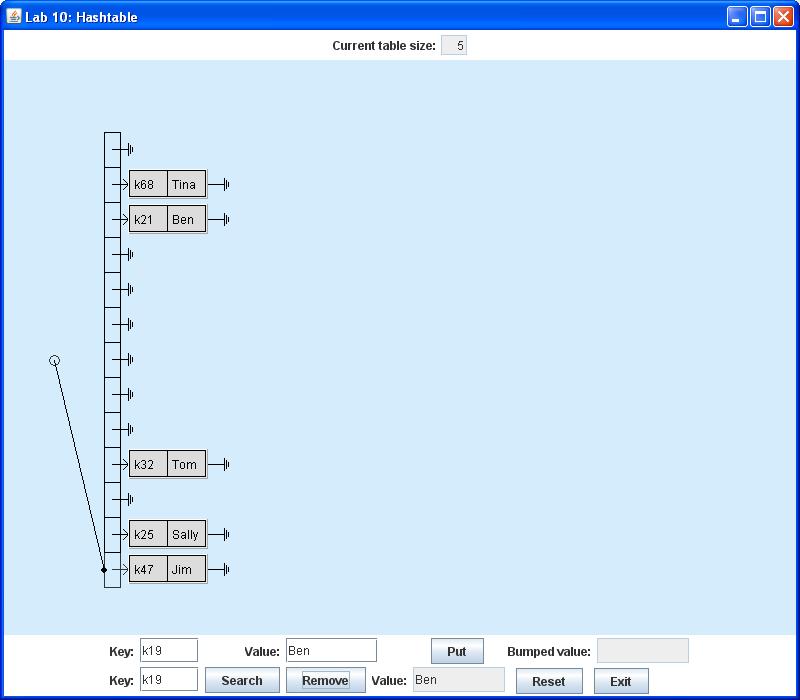
Note that in the case of both Search and Remove actions, it is possible that the specified key is not in the table. In this case the Value text box will simply display the message NOT FOUND.
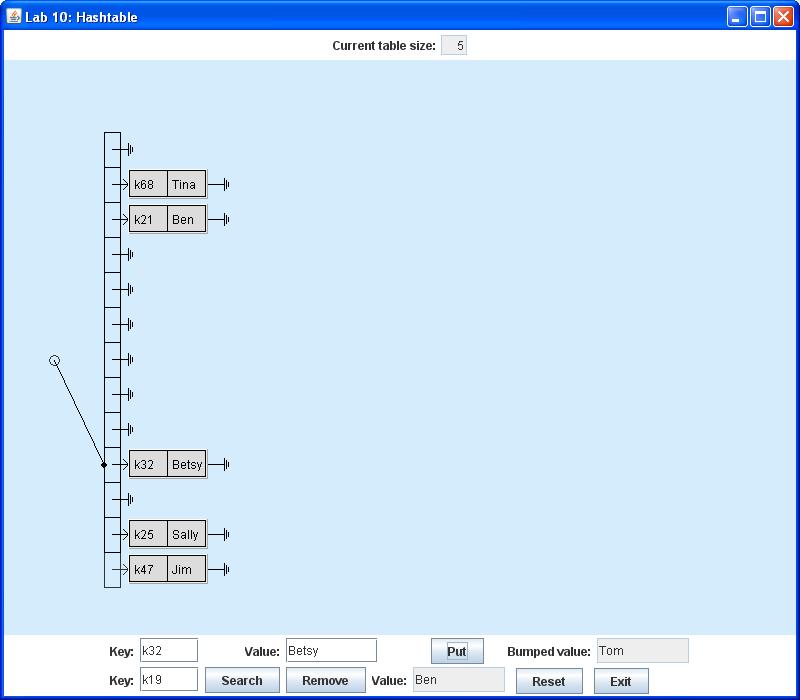
It is also possible to replace the value associated with a given key just by inserting a new (key, value) pair containing that key. In this case the value that was replaced ("bumped") will appear in the text box labeled Bumped value on the top row. For example, if you now used the top row of the control panel to insert the pair (k32, Betsy), this would simply bump the old value Tom without creating any new nodes:
To complete this project, follow the steps listed below:
| DisplayFrame.java | DisplayPanel.java | Hashtable.java | HashItem.java |
| Lab07.jar |
Lab07.jar provides essentially the same lab07 package that you completed in Lab 07. This project will employ the lab07.List class, which you recall is a singly-linked list. Note that you will need to download the version cited above for this lab, since it contains some new List rendering features not included in your original lab. In particular, the new version can display the List explicitly as a linked list, rather than showing it as a horizontal array.
	DisplayFrame frame = new DisplayFrame();
	frame.setVisible(true);
In this lab each linked-list node in the Hashtable will contain a HashItem object. A HashItem contains a String as the data or value of the object, and another String variable key which serves as a unique identifier for its associated value. The key is used in the insertion, retrieval and removal of the value. Note that the key must be unique, that is, no two items in the Hashtable may have the same key. However, two or more items with distinct keys may be associated with identical data values. Note that the HashItem class is already implemented and ready to use in this project.
As mentioned in the Introduction, these methods are a subset of the public methods in java.util.Hashtable. You can verify this for yourself by going to the online Java 2 SE API Documentation and checking out the methods provided by the java.util.Hashtable class.
Note finally that Hashtable.java does include a completely implemented render() method, which enables a Hashtable object to draw itself in the display panel. If you implement all the methods listed above according to the following specifications, render() will display the list as shown in the sample figures in the Introduction. You should note, however, that this rendering method is really intended to depict explicitly the implementation of our "home-grown" Hashtable. It may not reflect the actual implementation of the standard java.util.Hashtable. However, the GUI test application should still be able to work with either implementation, even if the graphical representation is not always a "true" one.
You should now proceed to implement all of the Hashtable methods listed above. Be sure that the methods correctly perform their respective tasks as described below:
In this lab each pair is packaged together as a HashItem object, which is itself stored as the "data" in a List node.
Now you may recall from the Introduction that the keys in the table must be unique, meaning that no more than one (key, value) pair with a given key may be stored in the table. This means that put() cannot just blindly insert a new pair into the table. Instead it must first determine whether a pair with this key has already been stored in this List. If so, put() must replace the associated value in that HashItem and return a reference to the previously stored value. But if this is in fact a new key, put() must insert a new node containing this (key,value) pair into the specified List. (Remember that this pair must be packaged together as a HashItem, which is actually the data type stored in the node.) In this case put() returns null.
There are still more subleties involved here. Since the hash table is designed for maximum generality, it does not assume that keys can be ordered in any way. In fact, the way you will need to compare two keys is to use an equals() method, as for example in a statement like
someKey.equals (anotherKey);
The lack of key ordering also implies that put() will have to scan the entire list to determine if this is a new key. (If it finds at any point that the key is already in the list, it just stops the scan, replaces the associated value, and immediately returns the old value.) Note, however, that it does not matter where new (key, value) pairs are actually inserted into the list. You should simply choose the most convenient option (front, rear, whatever).
To compute the hash values for this lab, you can actually use a method named hashCode(). This method happens to be inherited from the Java root class java.lang.Object, and has the form
public int hashCode ()
Also, it turns out that render() method for the Hashtable will need to know the most recent hash index that was used to insert or retrieve a value. At any time, it will expect this hash index to be stored in the Hashtable member variable lastHashValue.
So to make everything work out properly, insert() needs to start with a statement like
lastHashValue = key.hashCode () % array.length;
When your project is complete and working correctly, demonstrate it to your lab instructor. Then, before you exit NetBeans, clean your Lab10 project. Finally, before you logout, open a terminal window and use the cd command to enter your csci/202/labs directory. Then create a JAR file of your Lab12 project folder, using the command
jar cf Lab10Project.jar Lab10Please leave both the project folder and Lab10Project.jar in your csci/202/labs directory for the remainder of the semester.