In this lab you will finish a partially written Java GUI application that demonstrates the basic operations of a list. The project is similar to your labs Lab 04 and Lab 05 which introduced you to stacks and queues. This time you will encounter yet another fundamental data structure, which many recent textbooks refer to as a list.
Of course stacks and queues are themselves lists in an informal sense, but in modern computer science terminology a list has its own rules for adding and removing data which differ from those of a stack or a queue. Remember that in the case of a stack, additions and removals can only occur at one end of the list, which is called the top. For a queue, both ends of the list are given names, typically front and rear. Additions can only be made at the rear, while removals can only occur at the front. In contrast, additions and removals can be done anywhere within a list.
In this lab you will implement a list using an array, in a manner similar to that used in your earlier labs on stacks and queues. As before, the list will also store values of type Object (which automatically includes objects of any class in Java).
Once again the GUI framework has already been created and tested, and a partially written source file of a List class will also be provided to you. Your task is to implement several essential List methods, which are presently only stubs. The GUI demo application will need correct versions of all these methods to work properly.
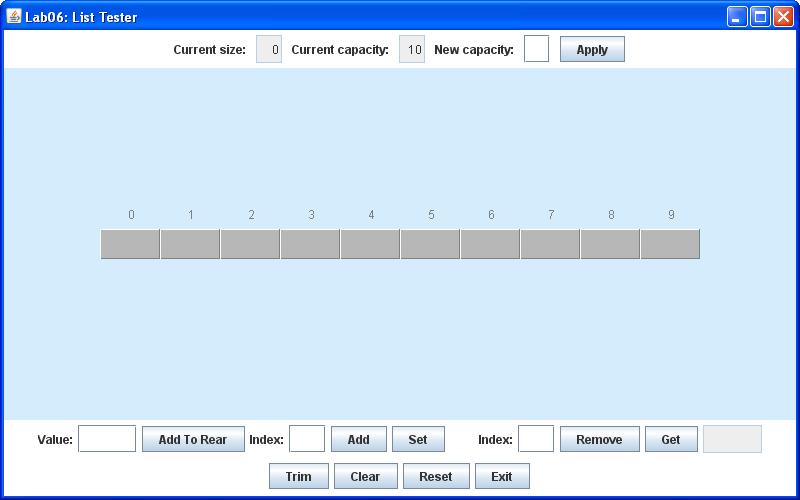
After you have completed the List class definition as described below, you should be able to compile all the files and run the project. Initially, the application should display the following window:
The GUI framework already includes event handlers that respond to user clicks on each of the buttons at the bottom of the window. These buttons are used to change the state of a single List instance shown in the middle of the window.
This time the internal List array appears as a horizontal sequence of boxes, with the zeroth component on the far left. The index labeling each list component is shown just above the box displaying its value.
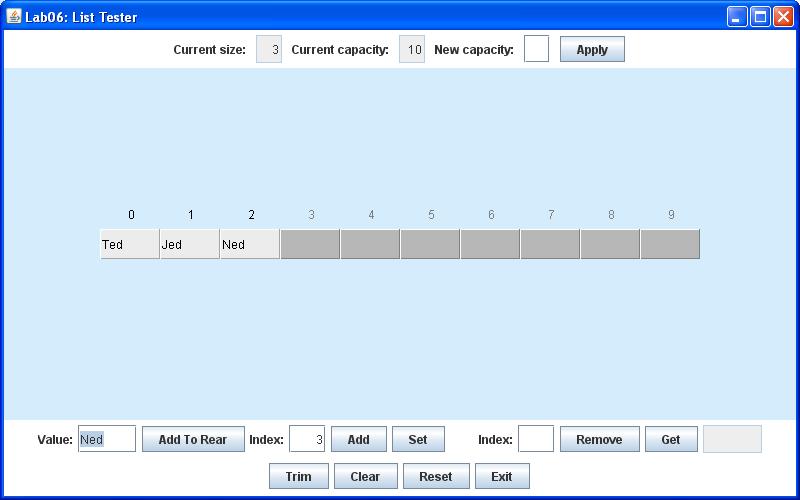
As usual, the GUI application for this lab will allow you to store String values in the list. To add a string (say a name) to the rear of the List (just as you would for a queue), enter it in the leftmost text box in the bottom control panel and then click the Add To Rear button. (As a shortcut, you may also just press the Enter key while the Value textbox is still in focus). The following image was taken after adding the names "Ted", "Jed", and "Ned" this way:
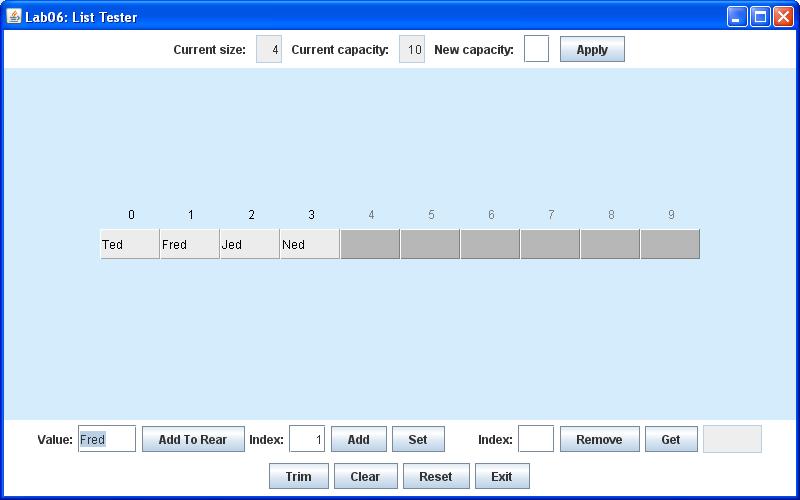
However, a List also allows you to add values anywhere within the list, not just at one end or the other. It might be more appropriate to call this sort of operation insert, but we will stick with the name add for any sort of addition to a List. Of course you have to indicate where you want to add a new value, but you do this by simply by providing an index as well as the value itself. The List will then shift all values at that index and above by one location to the right, and afterward insert the value at the newly vacated location. For example, you may wedge "Fred" into this list at index 1 by entering both the value and the index and then clicking the Add button, as shown below:
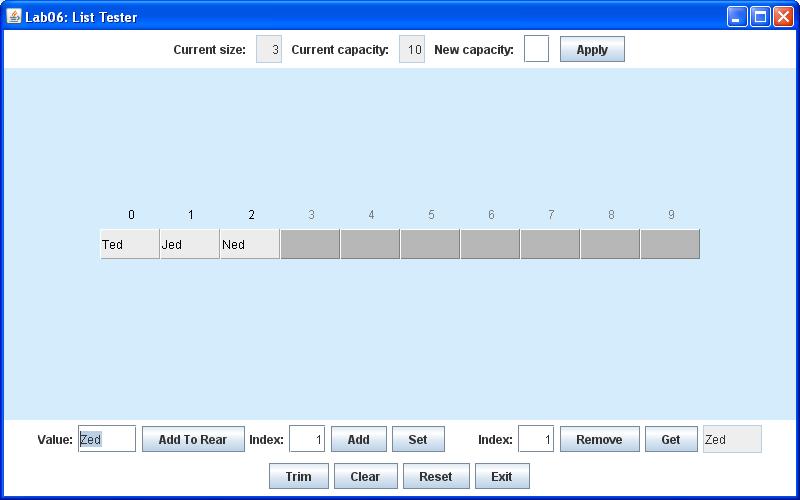
It is also possible to replace a value at any occupied location, again by providing both the new value and the index where the replacement is to be made. The GUI application will do this for you if you just click Set rather than Add. The image below shows the result of replacing "Fred" by "Zed":

To remove a value, you must specify its index (at least that is all our List will do in this lab). Then if you click the Remove button after entering an index, the value at that location is removed and shown in the text box just to the left of the Remove button. Also, the List will fill in the vacated location by shifting all remaining values to the left by one location. For example, you can remove "Zed" as shown below:
In some situations you may just want to see what value is stored at a given index. In that case, you can click Get instead of Remove, and the value at that index will be displayed without changing the state of the List.
Of course a List should also be automatically resizable, but fortunately for you a List can use precisely the same resizing method, namely setCapacity(), that you implemented in Lab 04. So this part will already be provided for you.
Some remaining details should be clarified before you plunge in:
The Trim, Clear, and Reset buttons all have the same functions as their counterparts in Lab 04 and Lab 05 Trim adjusts the List capacity to match the number of currently stored components. Either Clear or Reset may be used to remove all values from the List, but Reset also resizes its internal array to its original length.
Finally, the GUI components at the top of the window also are similar to components provided in your earlier labs. The text boxes on the left display the current number of values stored in the List and its current capacity (length of the internal array). The text box labeled New capacity and its associated Apply button allow you to change the List capacity directly.
To complete this project, follow the steps listed below:
| DisplayFrame.java | DisplayPanel.java | List.java |
	DisplayFrame frame = new DisplayFrame();
	frame.setVisible(true);
Note, however, that List.java does define all the instance variables for the List class as well as two fully working constructors. It also includes a fully implemented render() method, which enables the DisplayPanel to draw the List object in the display area of the window. And it even contains complete implementations of several familiar methods like setCapacity() and trim(), since they happen to be identical to versions you have written in your previous labs. However, you should note that one of these methods has been renamed, from getItemCount() to size(). As before, this method returns the current number of values stored in the list. The name has been changed in this lab only to make our List class conform more closely to a standard class already provided in the Java library. But more on that later in the course...
Before proceeding, you should look over the declarations for both the instance variables and the constructors.. As usual, both are near the top of the class definition.
Now proceed to implement the bodies of the methods listed above, so that they perform the following tasks:
The method must then check whether the specified index is in range. In this case the index must either correspond to an existing value, or it may be just one position beyond the last stored value. In other words, add() will not be allowed to create any gaps in the array. If it turns out that the index is not in range, the method must immediately throw an IndexOutOfBoundsException.
Otherwise, add() must go on to put its value parameter into array[index]. But before it can actually do that, it must first shift the current value at that location and all locations beyond it to the next higher index, to make the target location available. At first glance you think this will be a challenging part of this lab, but actually all it takes is a simple loop that could be written in only two lines.
Finally, add() must increment the List instance variable itemCount, which keeps track of the current number of stored values.
Otherwise, the method must replace the value currently stored at the specified index by the specified new value. It also must return the value that was replaced.
Otherwise, the method must declare a local reference to the array component indicated by the specified index, since on exit it must return this value. Then it must shift all components beyond this index downward by one position (to the left in the figures shown above), with each component moving one index lower. Finally, remove() must decrement the itemCount instance variable before returning the value that was removed.
When your project is complete and working correctly, demonstrate it to your lab instructor. Then, before you exit NetBeans, clean your Lab06 project. Finally, before you logout, open a terminal window and use the cd command to enter your csci/202/labs directory. Then create a JAR file of your Lab06 project folder, using the command
jar cf Lab06Project.jar Lab06Please leave both your project folder and Lab06Project.jar in your csci/202/labs directory for the remainder of the semester.