In each the remaining labs of the course you'll be building and running Visual C++ programs. In this lab, the process you will use will be explained in great detail. It is important that you master these steps now so that you can do them without reference to this lab page in the future.
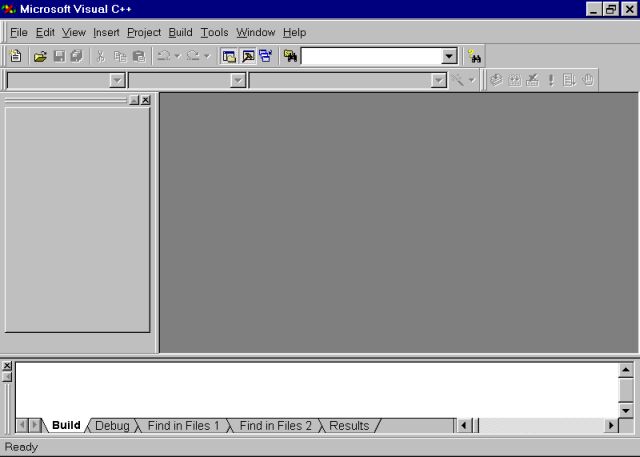
You should see a large window, the primary window of the Visual C++ development environment.
Click on OK to start creating the project.
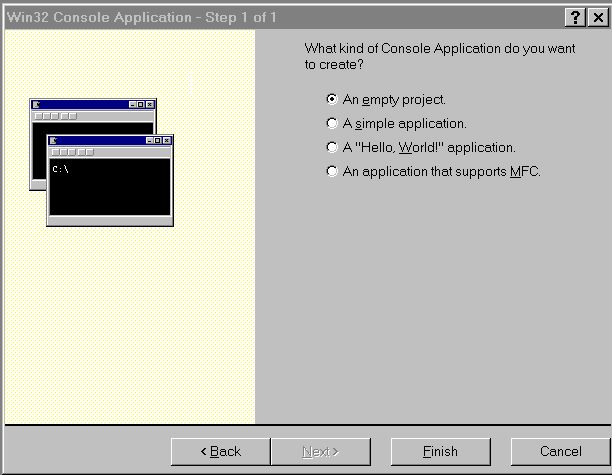
Select an empty project.
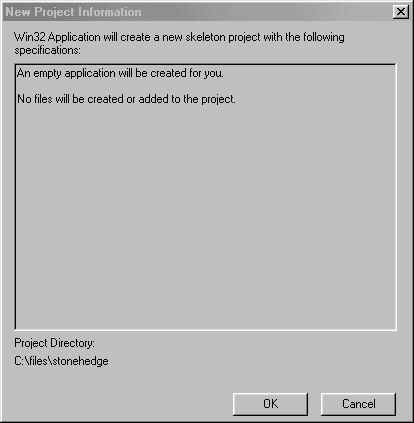
Hit OK to finish creating the stonehenge project.
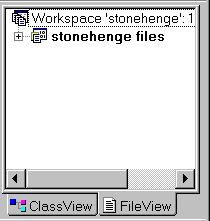
The sub-panel in the upper-left hand corner of your Visual C++
window is called the Workspace window.
It should
now look something like:

Press on the lower tab on the Workspace window labeled FileView.
This will bring up outline-like display
of the files of your project. Right now you haven't added
any files to your project, so don't expect to see much.
Now press the down arrow at the end of the
Look in choice.
You'll see an explorer-type file menu.
Navigate through the menu until you find the EzWindows library located
at :
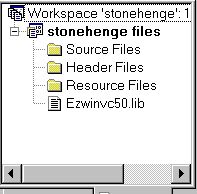
Go back to the Workspace window and select the FileView.
If there is a plus sign to the left of your project name,
press it. It should change to a minus sign.
Now you should be able to see that the EzWindows library
has been added to your project.
Start with the menu choices
Tools » Options....
to raise the Options dialog menu.
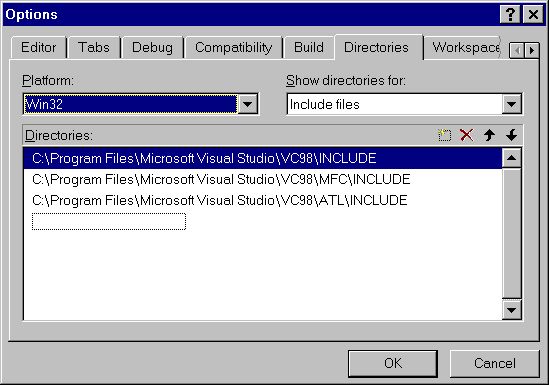
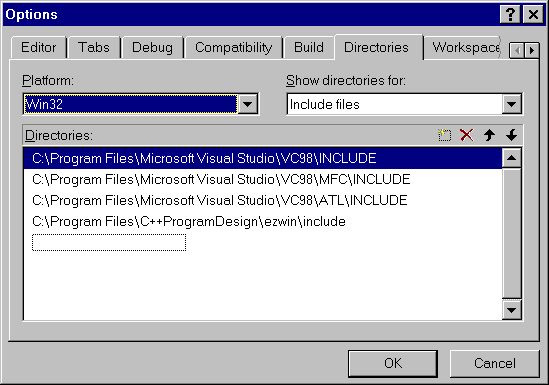
Select the Directories tab.
At the end of the Directories list, you
should see a blank entry. Move your mouse into that
blank and double click. The blank entry will be replaced
by a new larger blank followed by a box with three dots.
Believe it or not, if you click on the three dots, you'll get a
Choose Directory dialog window. Using the dialog window, select
the following directory:
If you are in the ezwin/lib directory, just click on the ezwin
directory icon and then the include directory icon.
Then click OK a couple of times and the include directory
will be added to your project as shown below.
Each time you use ezwin you will need to make sure both the ezwin
library and the include directory have been added to your project.
Select the Files tab and then select
C++ Source File as the file type.
Go into the File name and
enter the file name stonehenge (the file extension .cpp
will be added automatically). Make sure the Add to project
box is checked.
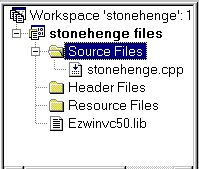
Press OK. Now press the + sign by the source label. Your Workspace window should
now show the new file.
Load up our version of the program
stonehenge.cpp
by pressing on this .
Of course, once you've done that you can't read this page, so
you better come back and read a little ahead.
OK. You've followed the link and have our version
of stonehenge.cpp in your Netscape browser.
Make the menu selections Edit
» Select All.
This should cause the entire program to be high-lighted.
Now do Edit » Copy.
This makes Windows stash the program away.
By the way, the control character
keystrokes ^A ^C do the same thing.
Now come back to this Netscape page and stop reading ahead.
Move your mouse into Visual's empty C++ program window and
Edit » Paste through
the menus or ^V through the keyboard.
You execute your program with the
menu selections
By the way, the reasons we have mentioned the keystroke
shortcuts in this section is that we know
that you will be re-building your program many times.
To terminate the display, mash the "X" in the upper-right hand conner
of the window.
Your job is to modify your program so that it gives a more
accurate rendition of the final version of Project Stonehenge.
You may have to dust off your high school geometry skills to
figure out how to size and place the spans.
Ask your lab instructor to verify that you've
modified the stonehedge program to produce the display shown above.
After you have modified and tested your code, ask your instructor to
run it.
Adding the EzWindows library
Adding the EzWindows library to your project isn't easy.
Start with the menu choices
Project
» Add to Project »
Files to
raise the Insert Files into Project dialog.
Press on the small down arrow just at the end
of the Files of type choice.
You'll see a long list of selections. You'll need to scroll
down the list until you find the choice
Library Files (.lib). Mash it.
Remember this for future labs. When you have located the library,
your window should look like this:
Then you can just punch OK.
Adding the EzWindows include directory
You also need to change the project options to include the
EzWindows library.
If you've done this before or another student has done it on the computer you are using, you may already see the
EzWindows include directory, in which case you can skip
on to the next section.

Creating a C++ source file
Add a new C++ source files called
stonehenge.cpp
to your project.
Start this by going through
Project
» Add to Project »
New menu choices.
This brings up a dialog box entitled New.
Writing a C++ source file
Normally, you just start writing C++ statements into
the blank program source window.
however, today we'll give you a head start.
About that program
The code similar to
SimpleWindow MyWin("Your name's winder", 18.0, 11.0) ;
and (on the first line of ApiMain)
MyWin.Open() ;
create a window with the title, "Your name's winder," that is 18 by 11
centimeters in size and display it on the screen.
The calls
RectangleShape Column1(MyWin, 4.0, 8.0, Blue, 2.0, 6.0) ;
Column1.Draw() ;
create a blue rectangle that is centered at a point 4 cm from the
left edge of the window and 8 cm from the top edge. This
rectangle is 2 by 6 cm in size.
Building and executing the program
You can build your program with either the
menu selections ![]() ,
or the key F7.
Any errors that were uncovered in building your program
will be displayed in the Output window at the
bottom of the Visual C++ main window.
,
or the key F7.
Any errors that were uncovered in building your program
will be displayed in the Output window at the
bottom of the Visual C++ main window.

If you have errors, you'll need to use the output window's
scroll bars to actually see the error messages. (By the way, you
should not have the error shown below.)

![]() ,
or the odd control keystroke ^F5.
,
or the odd control keystroke ^F5.
Running this program
When you run the program, you should see
four blue columns displayed in a window.
This is an accurate representation of
a recently discovered initial design made by
one of the Project Stonehenge engineers.
(Actually, the engineer really specified grey columns, but
EzWindows doesn't support that color.)
![]()
Lab Assignment
You do this by adding four statements to your C++ programs.
These statements will define RectangleShape
objects for the two spans and draw them into the window.
What can go wrong?
Make absolutely sure that you have terminated
execution of your program before you try to modify and rebuild it.
Lab Checkoff
Extra Credit
Just to show off your knowledge of geometry, make
the rectangles in Stonehenge Red and rotate the whole thing (window and
rectangles) ninety degrees so that Stonehenge is standing on its side.
Stonehenge will look like two C's, one above the other.
Extra Credit Checkoff
Return to CSCI 201 page
![]() Return to the UNCA Computer Science home page
Return to the UNCA Computer Science home page