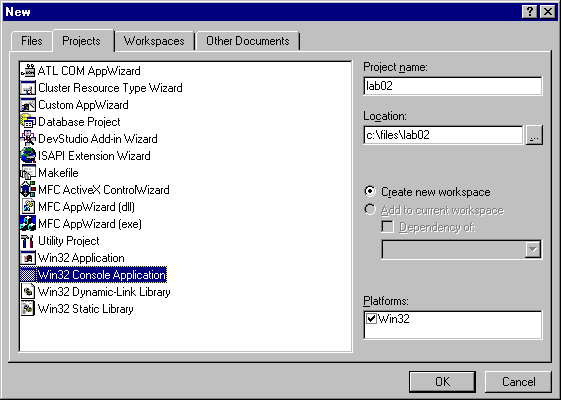
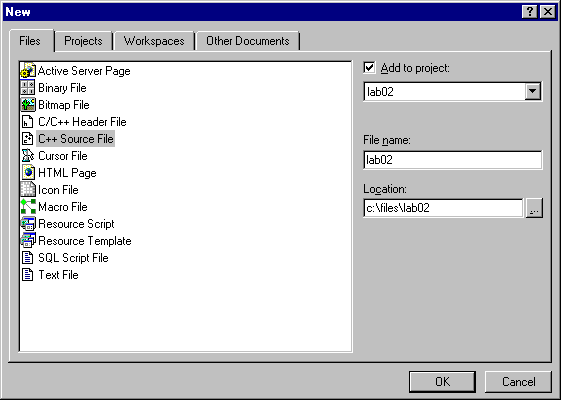
In the left hand panel, select Win32 Console Application. On the right hand side, give lab02 as your Project name and c:\files\lab02 as your project Location.
Your dialog window should look like the following graphic before you confirm your selection with the OK button.
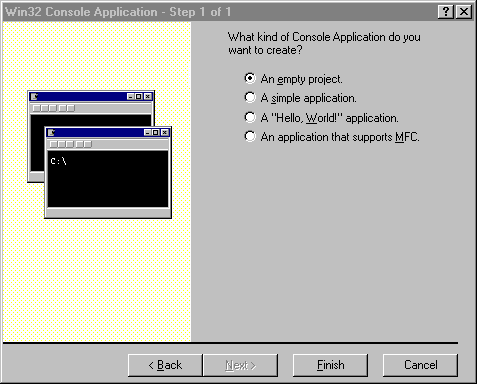
Select An empty project and then hit the the Finish button on this screen.
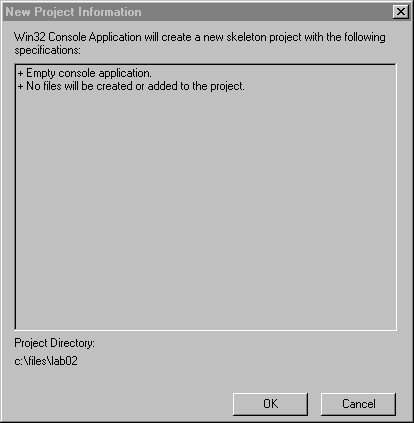
hit the OK button on this screen.
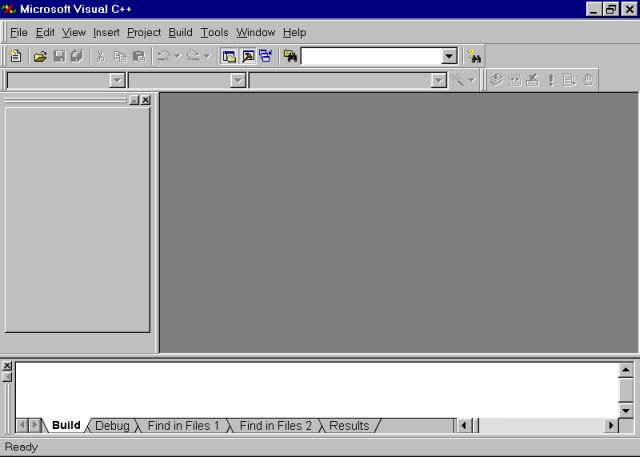
The sub-panel in the upper-left hand corner of your Visual C++ window displays information about your workspace. It should now look like:
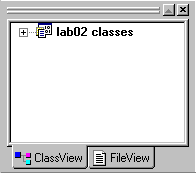
Click on the File View tab at the bottom of the
left window. The tab is just to the left
of the Class View tab.
Once you are in the FileView window, click on the + at the
start of the lab02 files line.
Notice that three more "folders" appear.
Click on the folder labeled Source Files.
At this point, the File View window should list the folders
and files of your program. To its right
there should be a window labeled lab02.cpp.
This is where you will type your C++ code.
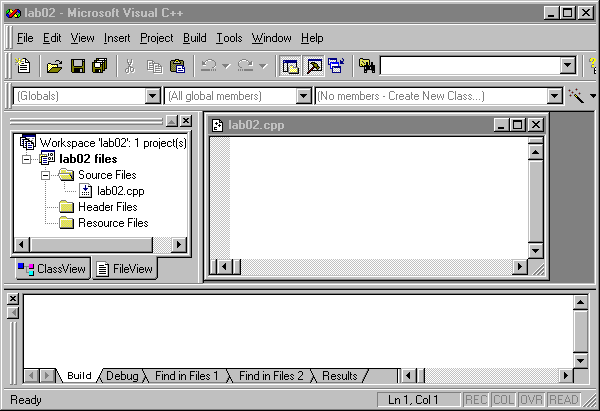
Move your mouse into the upper-right panel and start typing
the following program:
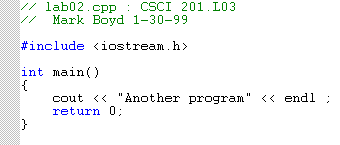
but with your name, lab section and the current date.
Notice all the pretty colors Visual C++ uses to display
your program.
Be sure to include your name in a comment at the
beginning of all C++ programs you write for CSCI 201!
If you didn't make any typing mistakes, you
should see the following displayed at the bottom of
the window.

If you did make a mistake, correct it and keep building
until you get the message

Whenever you see the section heading Lab Checkoff you must get the attention of your instructor and have she/he verify that you have completed some activity---this is how you get credit for the lab.
Ask your lab instructor to verify that your C++ program runs.
Modify the program that you typed above to introduce two syntax errors:
Now build your program again and notice the error messages that appear in the output window at the bottom of the application window.
Double-click on the first error message and notice that, in the code
window, an arrow appears at the left of the line containing the
first syntax error. This is where the compiler first detects the
missing semi-colon.

Ask your lab instructor to verify that you have located the first error.
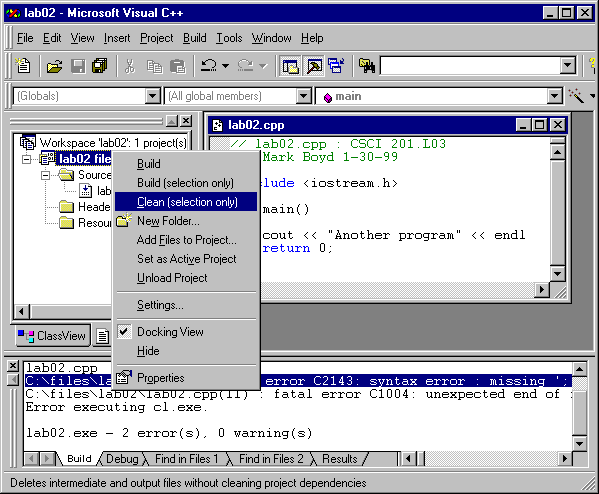
The files Visual C++ has generated in building your programs are much too large to copy into a floppy disk to take home. You must "clean up" your workspace to make it fit on a floppy.
Move your mouse over to the Project Workspace window and mash the FileView tab. Use your mouse to select the project. Click on the right mouse button. A pulldown menu should appear. Select the item
Copy your workspace onto your floppy by performing the following steps. (Alternatively, you can use Windows Explorer to display the necessary files and directories as you were shown in Section 2 of Lab01.)
Ask your lab instructor to verify that your program is stored on your floppy disk.