In today's lab you will be introduced to the personal computer that you will use through the remainder of the semester. Today you will learn the following:
If your computer is turned off, power it on.
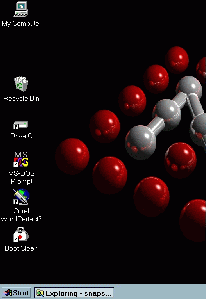
The running computer should display a desktop similar to the following picture:

At the bottom of the screen is the taskbar. It contains the Start button, which can be used to quickly start a program or find a file.
Select the Start button with the left mouse button and you will see a menu that takes you to various programs you can run by selecting them with your left mouse button.
Move your mouse so that the cursor (the small arrow on the screen) moves up and down the selection of programs on the Start button menu. Notice that when you move the cursor to a menu selection with a right arrow, a sub-menu is displayed showing you more even more selections.
We will now start a program using the Start button menu. The program that we will run is called WordPad. We will start it by selecting (clicking with the left mouse button) the program name from the Start button menu. To find the program named WordPad:
Observe the window for the WordPad application.
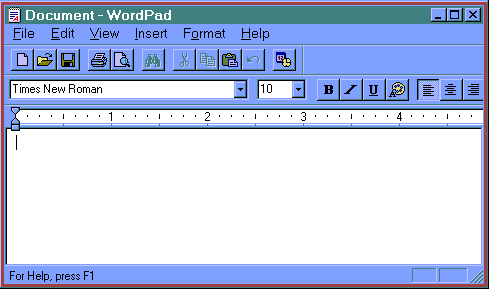
At the top of the window is the titlebar which shows the name of the
application that is running. On the right side of the titlebar are
three control buttons:
![]() These buttons control the window. The right most button, the button
with a large "X", stops the application from running and closes the
window. The middle button is used to resize the window, and the
left-most button is used to minimize the window, that is, suspend the
application and place it on the task bar where it can be restarted
later. Select each of these three buttons on the WordPad
window starting with the left-most button.
These buttons control the window. The right most button, the button
with a large "X", stops the application from running and closes the
window. The middle button is used to resize the window, and the
left-most button is used to minimize the window, that is, suspend the
application and place it on the task bar where it can be restarted
later. Select each of these three buttons on the WordPad
window starting with the left-most button.
After you have selected the left-most button you will notice that the window disappears and the program name shows only on the taskbar. To reopen the window, select the program name from the taskbar.
Notice that you can enlarge and reduce the size of the window by repeatedly selecting the middle button.
When you select the right-most button, the application will terminate and the window will close. You must restart the application from the Start button menu as described above; please do that now.
The last thing that we'll do in this section is look at other ways to change the size of a window. Once you have restarted the WordPad window, move the cursor to the right corner of the window. When the cursor is placed on the corner of the window, it changes shape to become a double-headed arrow. When the cursor has the shape of a double-headed arrow, depress the left mouse button and hold it down while moving the mouse, this is called dragging. You can change the size of the window by dragging any of the corners; try that now. Notice that you can also move the window in the desktop environment by dragging the titlebar; try that now.
Under the Programs menu on the Start button
select Windows Explorer.
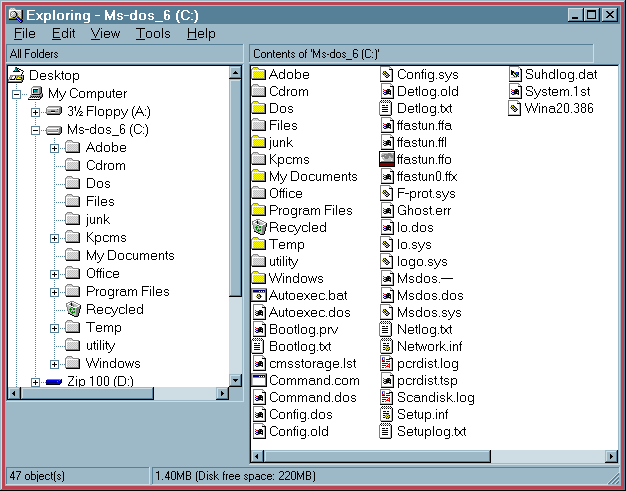
Windows Explorer can be used to display the hierarchical tree
structure of files and folders (![]() ) on your computer. The left-hand side of the window
displays the directory tree structure and the right-hand side of the
window displays the contents of the selected directory (i.e. the open
file folder
) on your computer. The left-hand side of the window
displays the directory tree structure and the right-hand side of the
window displays the contents of the selected directory (i.e. the open
file folder ![]() ).
).
To display the contents of a different directory left-click on that folder. Use the scroll bars on the sides of each window to view the entire contents of both windows.
Locate the files folder in the directory tree structure and open that directory (i.e., clicking on that folder).
Create a new directory inside of the files directory by right-clicking in the right-hand side window and then selecting New followed by Folder from the pop-up menu. The name of the directory, New Folder, will appear highlighted, change that name by typing Temp followed by a carriage return.
We will use this file later in the lab.
In this section, we will learn to use Netscape to access the Internet. As part of this section, you will find this lab on the Internet.
Begin by starting the Netscape program, you will find the
Netscape icon on your desktop.
![]() Double-click on that icon to start the Netscape
application.
Double-click on that icon to start the Netscape
application.
When Netscape first starts running, it displays the contents of the UNCA home page. This is the file located at the Internet address http://www.unca.edu/. That is the address shown in the location text window near the top of the Netscape window.
Your first task is to change the file that is displayed in the Netscape window. To do this, select File located in the toolbar near the top of the Netscape window, and then select Open Page from that menu. A small text window will appear and you should enter the URL, Uniform Resource Locator, of the information you wish to display. The URL is as follows:
This URL presents the list of Spring classes offered by the Computer Science department. The first part of the URL "http" indicates the transfer protocol, Hypertext Transfer Protocol, used to retrieve the page. The second part, www.cs.unca.edu, is the name of the computer containing the page. The final part, classes, points to a file stored on www.cs.unca.edu. Select the lab link under CSCI 201 to view the schedule of labs for this course. Select Laboratory 1 from the schedule to display the instructions for this lab in your Netscape browser.
From this point on, you are expected to complete this lab, and all future labs, by viewing the lab instructions in the Netscape Browser.
We are now going to transfer a file, from your computer to a directory on a different computer. You will use this same procedure to submit all homework assignments for this class.
First, you need to store a file somewhere on this computer; we will store it in the Temp directory that you created in Section 2. To view the file that you will store on your computer, select the hyper-link, the highlighted section of text, in the paragraph below. This should cause the contents of the file to display in your netscape window, but if the file extension .java has already been associated with a particular application program such as Jcreator, then it will cause that application program to begin running. In either case, you should be able to view the file. The file contains a simple Java program taken from Chapter 1 of your text; after you have looked at it, you should return to this page (select Back from the toolbar near the top of the browser window if the file displays in the Netscape browser). To store this file on your computer, do the following (read these instructions before beginning).
For files that display in the Netscape Browser
For files that display in the Jcreator application program
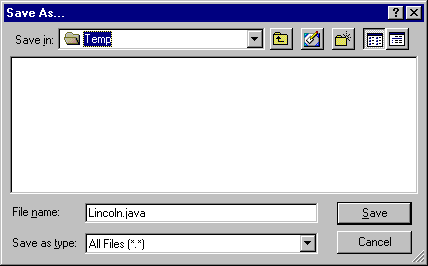
Now select this link, and store the file in your Temp directory as described above. This is the file you will transfer to your ftp directory.
Before you can transfer the file you must contact your lab instructor to get the name of the directory that you will use when submitting your homework. This is your personal ftp directory and it should not be used by others. Your ftp directory name is like a password, it should be kept secret. Once you have received your ftp directory name from the lab instructor, you can complete this section.
You will need to run an ftp (i.e., File Ttansfer Protocol) utility in order to transfer your homework files to your ftp directory. Although there are many ftp utilities, we are going to use the ancient DOS command-line ftp utility that is packaged with MS Windows. This is not the simplest ftp program, but it is one that is guaranteed to be available on your PC. So if you have an internet provider for your home PC, you can use this exact procedure to transfer your homwork from your home PC to your ftp directory.
cd C:\files\Temp
The prompt in the DOS window should now be C:\files\Temp indicating that you are in that directory.
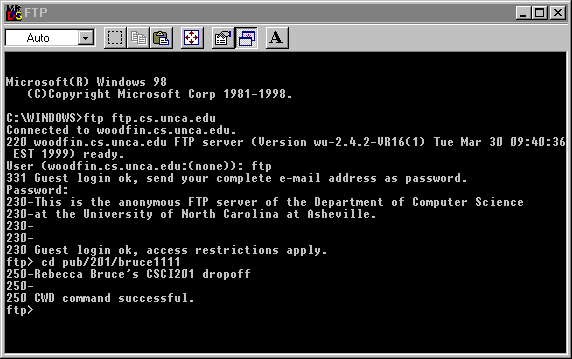
Check the message in the ftp window to make sure that you are in your own ftp directory.
Once you have transfered a file into your ftp directory you can not remove that file but you can replace it by transfering another file with the same name into the directory. The new file will overwrite the existing file.
In CSCI201, you muct be able to read and send mail from your bulldog account. In this lab, you will send a short note to your lab instructor telling him/her about your computer experinece. The email address of your CSCI 201 lab instructor is listed in the table below:
| Rebecca Bruce | bruce@cs.unca.edu |
| Joe Daugherty | jkdawg@cs.unca.edu |
| Susan Reiser | reiser@cs.unca.edu |
| Charlie Wallin | wallin@cs.unca.edu |
There are two ways to read and send mail from your bulldog account:
If you prefer to logon to bulldog to send mail, follow the instructions in the remainder of section 5 below.
The telnet protocol is used to connect to a remote computer
over the Internet. There are many programs that use the
telnet protocol. The one most frequently used in UNCA
computer labs is called NetTerm. To start
NetTerm double-click on the NetTerm icon.

NetTerm, like most Windows applications, has a menu bar at the top of its windows. The menu bar is a row of pulldown menus such as File and Edit. Immediately below the menu bar, you'll see a tool bar, a row of boxes containing icons. Press on the index card icon, the phone directory. When the phone directory is displayed, select the item
Digital UNIX (bulldog.unca.edu) (ttyp4)

login:
Jan 16,2001 (Tue)            Bulldog Main Menu          12:43:12 PM


   pine       Electronic Mail
   tin        Usenet (News)
   lynx       World Wide Web (text only)

   passwd     Change password
   logout     Finished using Bulldog

   exit       Exit this menu to the system prompt
              (turn off this menu)


Enter your choice (choices are case sensitive):
If you don't get the menu, move on to the next section.
If you do get the menu, quickly type "exit" followed by the Enter key. You'll then see another dialog:
Would you like the previous menu to appear each
time you use Bulldog (Y or N)
This time type the letter 'N' followed by Enter to stop this wimpish interface from interfering with your enjoyment of the Unix operating system.
You should now see the Unix command, or shell, prompt:
bulldog.unca.edu>
This will bring you to pine's main command menu:
          ?     HELP               -  Get help using Pine

          C     COMPOSE MESSAGE    -  Compose and send a message

          I     FOLDER INDEX       -  View messages in current folder

          L     FOLDER LIST        -  Select a folder to view

          A     ADDRESS BOOK       -  Update address book

          S     SETUP              -  Configure or update Pine

          Q     QUIT               -  Exit the Pine program
You'll then see the following simple form for sending email.
To      :
Cc      :
Attchmnt:
Subject :
----- Message Text -----
| Rebecca Bruce | bruce@cs.unca.edu |
| Joe Daugherty | jkdawg@cs.unca.edu |
| Susan Reiser | reiser@cs.unca.edu |
| Charlie Wallin | wallin@cs.unca.edu |
Hitting the enter key again takes you past the headers down into the message text area. Type a couple of paragraphs saying something about your experience with computers. You can use the arrow keys and the delete key to correct any mistakes.
When you are ready to send your message, type ^X (control-X). You should then be back at the main pine menu where you can type Q to quit pine and return to the shell prompt.
By now, you must be wishing for an easy way to flip between programs in Windows 95. Press the ALT and TAB keys simultaneously to bounce between telnet and Netscape.