Yes, you can do analog on an Arduino.
Lesson One
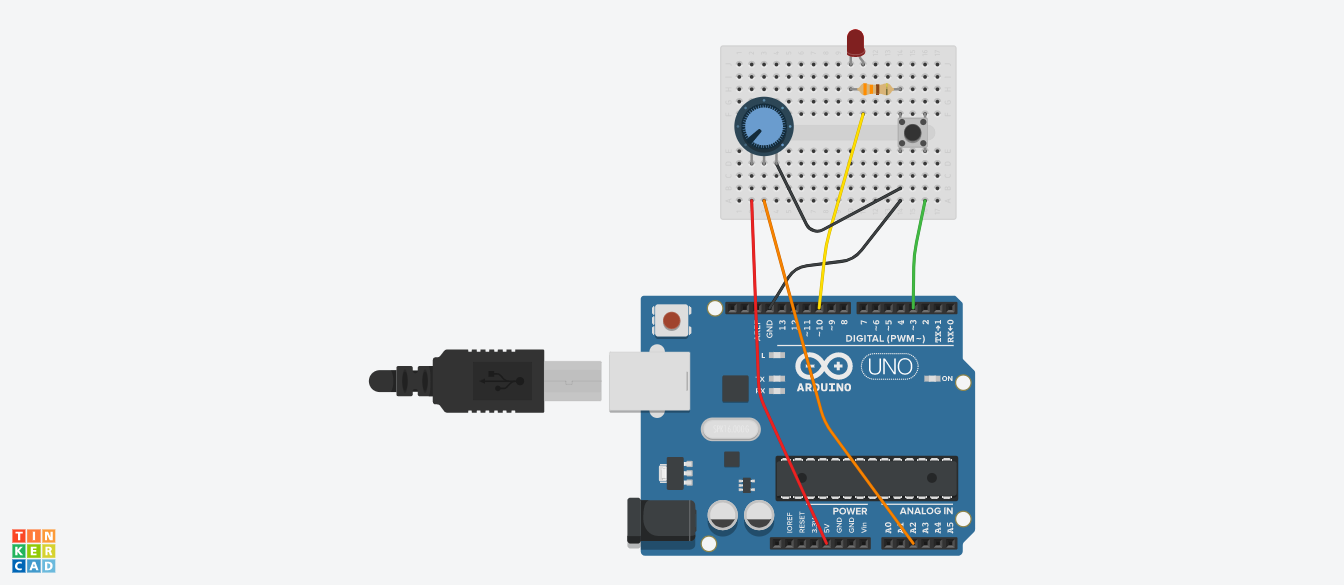
Build a circuit a bit like the following. The thing on the
left is a
potentiometer.
It really doesn’t matter which way you turn it. As long as the
middle wire is connected to an analog input.
Here’s some code to go with it.
Pay attention to the new functions:
analogRead(), analogWrite() and
map().
const int buttonPin = 3 ;
const int LEDPin = 10 ;
const int potPin = A2 ;

void setup()
{
	pinMode(buttonPin, INPUT_PULLUP) ;
  	// pinMode(LEDPin, OUTPUT) ;
}

inline int buttonPressed(int inPin) {
  return (digitalRead(inPin) == LOW) ;
}

inline int ledTurnOn(int ledPin, int setOn) {
    digitalWrite(ledPin, setOn ? HIGH : LOW) ;
}

void loop()
{
  if (buttonPressed(buttonPin)) {
    analogWrite(LEDPin, 0) ;
  } else {
    analogWrite(LEDPin, map(analogRead(potPin), 0, 1023, 0, 255)) ;
  }
  delay(100);
}
Lesson Two
Now build the circuit.
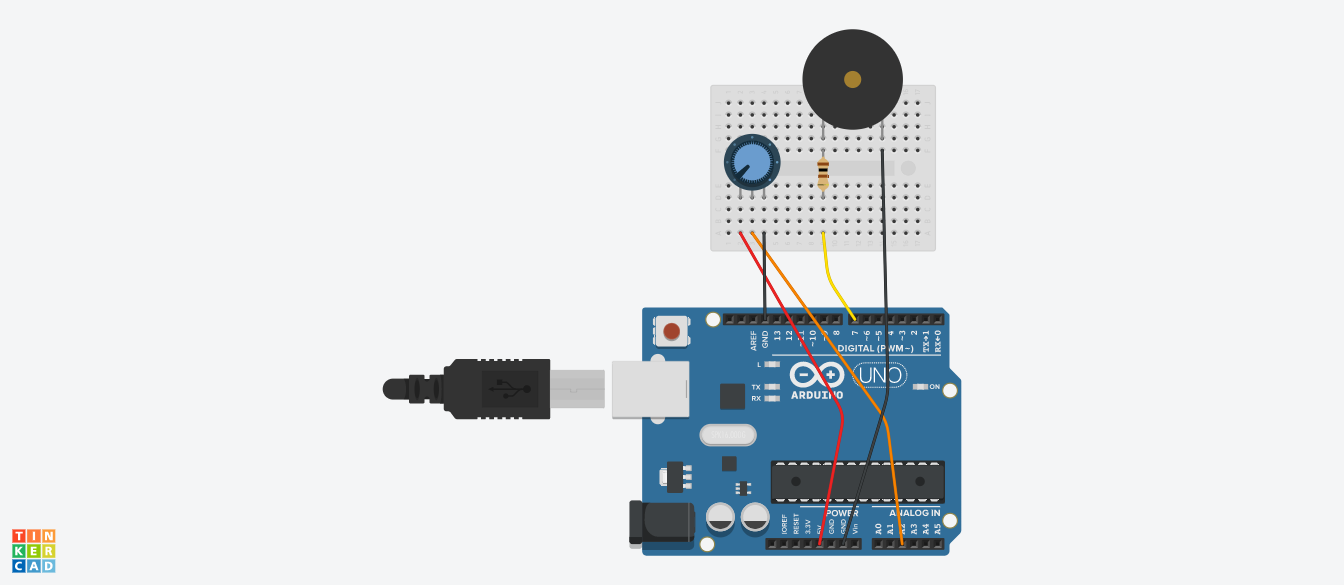
This one has a
Piezoelectric
speaker or buzzer.
The orientation is important.
Be sure the lead with the plus sign is ”pointing“ toward
the Arduino digital pin.
It also has a new call tone().
const int potPin = A2 ;
const int speakerPin = 7 ;

void setup()
{
    pinMode(speakerPin, OUTPUT) ;
    Serial.begin(9600) ;
}

const int tones[] = {300, 400, 450, 600} ;

void loop()
{
  delay(1000) ;
  Serial.println("silence") ;
  for (int i=0; i<sizeof(tones)/sizeof(*tones); ++i) {
    tone(speakerPin, tones[i], 1000) ;
    delay(1000) ;
    Serial.println(tones[i]) ;
  }
}
Now what 1
Make a musical instrument. Combine the code of the two examples and control the pitch with the potentiometer.
If you get serious, pay some attention to music theory. As you move up the scale, the frequency increases exponentially.
Now what 2
If replace the calls to tone with a delay loop,
you might be able to play two notes simultaneously.