Introduction Lab - Linux
The goal for this week's lab is to learn about the computer environment and applications you'll use in your CSCI 201 labs. You don't need to have a broad knowledge of computers to write simple programs, but there are a few skills you do need. Here's what we'll cover:
  1. Controlling applications in a windowed environment
  2. Using files and directories
  3. Submitting your homeworks.
  4. Using FTP to transfer files
  5. Running Java in a command session
Controlling Applications in a windowed environment
To Get Started ...

This lab assume you are using the network Linux workstations managed by the Department of Computer Science at UNCA. We're also assuming that by the time you are reading this page in class, you have already opened it in a browser window. This means that you have successfully found a computer, powered it up, logged on, started an Internet browser and loaded this page. If this is not a correct assessment of you situation, please refer to First log in to Linux at cs.unca.edu to get started in the proper configuration.

The running computer should display a desktop similar to the following picture:

GNOME at UNCA CSCI

Hey. It doesn't look that different from Windows does it? In fact, the Linux and Windows user interfaces are derived from a common standard defined about a decade ago. The initial display may be slightly different on other versions of Linux. The Computer Science machines use the GNOME desktop as specialized by Red Hat. For a little more information on the Red Hat Graphical Desktop consult Chapter 2 of the Red Hat Linux Getting Started Guide. For a lot more information on Gnome consult a recent copy of the GNOME Desktop User Guide

The "Taskbar" and "Start" button

At the bottom of the screen is the "Panel". It is very similar to the Windows "Taskbar". On the left side of the panel is a row of "launcher icons".
Bottom Edge Panel
The leftmost button, the one that looks like a red hat, is the Red Hat Linux Main Menu button. It is similar to the Windows "Start" button.

Select the Main Menu button with the left mouse button and you will see a menu that allows you to run applications by selecting their icons with your mouse.

Move your mouse so that the cursor moves up and down the selection of items on the menu. Notice that when you move the cursor to a menu selection with a right arrow, a sub-menu is displayed showing you more even more selections.

Navigate through the menu to start a text editor called gedit. You'll find it by going from Accessories to Text Editor.
Wrong GNOME menu for gedit

The titlebar and its controls

Observe the window for the gedit application.
gedit
For you Windows users, it's deja-vu all over again. At the top of the window is the titlebar which shows the name of the application that is running. On the right side of the title bar are three control elements: _OX. The rightmost button, Close button, is the close windows button. This button terminates the running application and closes its window. The middle button, Maximize button, is the maximize button. It expands the window to the size of the full screen. This is rarely anything you'll want to do. Only the left-most or minimize button, Minimize button, remains. This control suspends the application. There is a "taskbar" at the bottom of the screen that can be used to revive suspended applications.
Window List

Moving and resizing the window

If you press the leftmost mouse button within the titlebar of a window, you can drag the application to different locations within the screen.

If you move the mouse to the edges or corners of a windows, the cursor will become a two-headed arrow. If you then press and hold down the leftmost mouse button, you can change the size of a window.

Trying it out

There's no point in giving more explanation. It's time for you to take your gedit for a spin around the display. Move, resize, minimize, and unminimize. If you have any trouble, get the attention of your lab instructor or the person in the adjoining chair.

Menu Bar

Directly below the titlebar of gedit is the menubar, a row of words such as such as File and Edit. If you press a word on the menu bar, you will be rewarded with a pulldown menu, which can be used to direct the actions of the applications. Below the menu bar, you'll often find a toolbar, containing many icons that represent frequently performed actions, such as printing.

Using files and directories

If you've taken, CSCI 107, you should have learned quite a bit about directories and files in Lab 2 of CSCI 107. If this is your first exposure to this concept, settle in for a few minutes of serious study. A file is a collection of data, generally formatted for use by a specific application, such as a database or spreadsheet. A directory is a collection of files and other subdirectories. You can think of files and directories as analogous to the structure of a file cabinet. The "file" corresponds to the documents you store in your file cabinet and the "directories" correspond to the file folders---they provide a way of grouping and organizing documents. "Subdirectories" are simply nested file folders---a folder inside of another folder.

File names

Files and directories have names. In both the Unix and Windows worlds, these names are series of directory names separated by slashes: forward slashes, /, in Unix; and backward slashes, \, in Windows. (By the way, it was Unix that first used the slash.) Here are example file names in Unix and then Windows:

Notice, that both of the above file names start with a slash, which means that both emanate from a special root directory. These are called absolute file names. Windows has the additional complexity that absolute file names may start with a drive letter, as in A:/autoexec.bat. This tells us that the file is located on a specific drive. Generally, drive letter A is the floppy disk drive and C is the hard disk. You may also notice that our example Windows file name contained spaces while the Unix file name did not. Although you can put a space in a Unix file name, it is not recommended and you would seriously offend true Unix gurus.

Notice that both of our example names end with ".html". In both Unix and Windows it is common for file names to end with a period followed by an extension, "html" is our examples. The extension generally identifies the type of the file. Remember that a file is a collection of data formatted for a specific application; the type of the file indicates the application. You'll be generating a lot of files with the extensions "java" and "class" this term; I'll bet you can guess the application.

Both Unix and Windows support relative file names. These names do not begin with a slash and are considered to emanate from the current directory. So, if your current directory is /usr/bin and you speak of the file X11/mwm, you are really talking about /usr/bin/X11/mwm.

Graphical display of files

Most computer users, especially those of the Macintosh sect, use directories and files with absolutely no idea of how a slash is used in a file names. They use file "explorers". Many, but not all, versions of Linux have a graphical file interface called Nautilus. However, we really don't do that many fancy things with files in CSCI 201, so we're going to just use the old-fashion Unix file commands. After all that's what all the true Linux gurus do.

Linux file Access

You might want to make sure that someone out exploring the Linux file system doesn't visit your home directory and look at your files' contents. Or perhaps, you are working with others and want to share your files. The way to control who gets to see what in your directories is where file permissions come in.

Permissions are divided into three types:

Their meanings are as follows:

Each of these permissions is set for each of three types of users:

File permissions are set or changed with the chmod command. Chmod requires you to specify the new permissions you want, and specify the file or directory you want the changes applied to.

To set file permissions, you may use to the "rwx" notation to specify the type of permissions, and the "ugo" notation to specify those the permissions apply to.

To define the kind of change you want to make to the permissions, use the plus sign (+) to add a permission, the minus sign (-) to remove a permission, and the equal sign (=) to set a permission directly.

EXAMPLES:

chmod g=rw- .shrc

changes the file permissions on the file .shrc, in your home directory. Specifically, you are specifying group read access and write access, with no execute access.

chmod go=r-- .shrc

changes the file permissions on the file .shrc so that group and other have read permission only.

If you want to learn more about Linux file permissions (and you should), take some time to read our Unix File Permissions tutorial.

Linux file commands

Below is a summary of the commands that you'll find useful in this course. Take a look at these commands, you'll be asked to use several of them in the assignment section below.

pwdPrint Working Directory:
Prints out the full pathname of the directory you are currently in.
cd (directory)Change Directory:
Changes your current directory. If you don't specify a directory as an argument, cd will bring you back to your home directory.
ls (directory ...)List:
Lists the contents of a directory or directories. If you don't specify a directory, ls will list the contents of the current directory. You may also supply filename(s) to ls in order to get more information about files.
The ls command also supports options: "ls -a (directory)" lists files that are normally hidden, and "ls -l (directory)" lists more information about your files including permissions. "ls -R (directory)" recursively lists the contents of the current directory and all of its subdirectories.
mkdir (directory ...)Make Directory:
Used to create a directory or directories.
rmdir (directory ...)Remove Directory:
Used to remove an empty directory or directories. The directories to be removed must not contain any files.
more (file)
less (file)
These two programs will let you view your file a screenful at a time. They both offer special viewing options such as paging backwards through a file and pattern searching. less is the more sophisticated of the two and has features that aren't found in more.
rm (file1 ...)Remove:
Removes the given file or files.
mv (file1 file2)
mv (file1 ... fileN directory)
Move:
Moves a file or directory. In the first form, (file1) will be moved to (renamed as) (file2). The second form will move a number of files into a directory which you specify as the last argument. Note that directory names can be used in place of the filenames in either of the forms, to move or rename directories.
cp (file1 file2)
cp (file1 ... fileN directory)
Copy:
Copies files. In the first form, (file1) will be copied to a file called (file2). The second form will copy a number of files into a directory which you specify as the last argument on the command line.

To learn more about working with Unix files and directories, take a look at this more comprehensive Unix file system tutorial.

Your Assignment ...

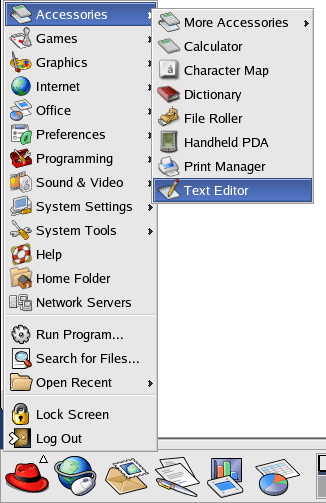
Start up a Linux terminal session. You can do this through the main menu via System Tools to Terminal, but it's much easier just to right-click the mouse in an unused part of the Desktop and request a new terminal. Now you can type raw Unix commands into your terminal session.


Linux terminal session

First type the command pwd, print working directory. This will give you the name of your current directory. The search for all relative file names (the ones that don't start with a slash) begin here. As shown below, the command should respond with /candler/users/(yourid). This indicates that your home directory is stored on candler, a Computer Science file server.

[user@mach dir] pwd
/candler/users/(YOURID)

You can list the contents of the current directory with the ls command. If this is the first time you've used your CSCI account, you'll be surprised to find that there is already a subdirectory in your home directory named "csci". Try the ls command. For more information try ls -a and then ls -l. The options -a and -l are separated from the command ls with spaces.

[user@mach dir] ls
csci
[user@mach dir] ls -a
.   csci    .dt         .emacs  .kde       .wastebasket
..  .cshrc  .dtprofile  .gtkrc  .solregis
[user@mach dir] ls -l
total 4
drwx------    2 lincolna man          4096 Aug 15 16:39 csci

The bare ls command lists just the csci directory. Adding the -a, for all, option causes several control files to be listed. In general, control files start with a period and are normally "hidden" by ls. Adding the -l, for long, option gives more information about your file. For example, you see the owner, size, creation date, and, most importantly, the permissions of the files.

Now, lets create the directory structure csci/201. We'll use the mkdir command to create the directories and use slashes (i.e, /'s) to indicate the relative positions of the directories as shown below.

[user@mach dir] mkdir csci
mkdir: cannot create directory `csci': File exists
[user@mach dir] mkdir csci/201

You may have noticed that there was no confirmation that the directories were actually created. Linux is like that. It only speaks when something goes wrong, like when you tried to create the directory csci which already existed. Type the command ls -R if you want to see if the directory csci/201 was actually created. "ls -R" means "list recursively" and displays the contents of all directories nested within the current directory.

Remember the "drwx------" you saw associated with the directory csci when you typed the ls -l command. The "drwx------" informs you that this directory and its subdirectory can only be accessed by you. This is very important because you will use the csci directory to store your homework for this class and restricting access to this directory prevents your homework from being copied.

Submitting your CSCI 201 homework assignments

In the section above, you created a 201 subdirectory within your csci directory. You will submit your homework for this class by storing it in your csci/201 directory. You will create a unique subdirectory under csci/201 for each assignment. The name of the subdirectory will be specified as part of the assignment, and you will store all files associated with that assignment in that subdirectory.

Your Assignment ...

As practice, lets create a lab1 subdirectory under you csci/201 directory as follows:

[user@mach dir] mkdir csci/201/lab1

You can create as many subdirectories as you would like in csci/201. Use the lab1 subdirectory to store your work for this lab.

Using FTP to transfer files

FTP, or File Transfer Protocol, is a very simple program that can be used to transfer files between different computers. In CSCI 201, you can use FTP to transfer files (e.g., your homework) between your home computer and school.

Preparing to FTP

In order to work this example, you will need a file to ftp. You can get one by copying the following Java code and pasting it into your gedit application.

//********************************************************************
//  Lincoln.java       Author: Lewis and Loftus
//
//  Demonstrates the basic structure of a Java application.
//********************************************************************

public class Lincoln
{
   //-----------------------------------------------------------------
   //  Prints a presidential quote.
   //-----------------------------------------------------------------
   public static void main (String[] args)
   {
      System.out.println ("A quote by Abraham Lincoln:");

      System.out.println ("Whatever you are, be a good one.");
   }
}

Now save the file under the name Lincoln.java with your in your csci/201/lab1 directory. By the way, be sure that Lincoln.java starts with a capital-L. When saving the file, be sure that you "click" through all three directories, csci, 201, and lab1. Below is a Linux screenshot as an example.
File Save example

The original FTP program

The ftp program "speaks" the FTP protocol to a file server when it transfer files. The ftp program was one of the first two Internet applications. It is a text-oriented program that may seem a little quaint compared to today's graphic-oriented programs, like the ones you'll be writing in Java. We are going to use the original ftp program because it is the only FTP uploader that "ships" with every copy of Windows XX and Unix. So you should be able to follow this procedure at home or school, no matter what computer is sitting in front of you.

Transferring files to your Linux account

To transfer a file you need to know three pieces of information:

  1. The name of the directory containing the file. In our example, that is csci/201/lab1.
  2. The name of the files to be transfered. We'll use Lincoln.java.
  3. The name of the directory where we wish to place the file. In our example, that is csci/201/FTPdemo.

Of course, it's rather silly to use FTP to transfer a file from a computer to itself. But we want you to pretend like you have created Lincoln.java on your home PC, which might just run Windows or Mac OS X, and you're going to transfer it to your Linux account.

Your Assignment ...

Go back to your terminal session window and type the command "ftp ftp.cs.unca.edu" (Windows users should press the Start button, then the Run menu button, and type "ftp ftp.cs.unca.edu" into the Open field and then hit enter). The FTP program should provide you with the following greeting:

Connected to ftp.cs.unca.edu.
220-UNCA CSCI Anonymous FTP Server
220-
220 FTP server ready.
User (candler.cs.unca.edu:(none)):

You should type your Linux user ID, YOURID, followed by the Enter key at this initial user prompt. You will then be prompted for a password; enter your Linux account password. Your password will not be displayed when you type it.

Connected to ftp.cs.unca.edu.
220-UNCA CSCI Anonymous FTP Server
220-
220 FTP server ready.
User (candler.cs.unca.edu:(none)): YOURID
331 Password required for YOURID.
Password:
230 User YOURID logged in.
ftp>

If you don't type your password correctly, you'll get a message that your FTP login failed. In that case you should type the FTP command user which will allow you another chance to provide the correct password.

If you have successfully connected, the ftp program should be at its command prompt: ftp> Your next step to do connect to the local directory where your files are now stored. This is done with the lcd (local change directory) command.

ftp> lcd csci/201/lab1   
Local directory now /candler/users/YOURID/csci/201/lab1

Now you must change to the directory where you wish to deposit the file. This is done with the cd command. In our example the name is csci/201/FTPdemo.

ftp> cd csci/201/FTPdemo
550 csci/201/FTPdemo: No such file or directory.

Of course it failed! You haven't created the FTPdemo directory. Fortunately, FTP has a mkdir command for just this situation. Create the directory and then connect!

ftp> mkdir csci/201/FTPdemo
257 "/users/YOURID/csci/201/FTPdemo" new directory created.
ftp> cd csci/201/FTPdemo
250 CWD command successful.

To transfer the file into the csci/201/FTPdemo directory, type put followed by the file name. You should receive some indication of successful transmission. Remember, we are transferring Lincoln.java. You can also transfer a file out of the csci/201/FTPdemo directory by typing get followed by the file name; we will not demonstrate this command in lab.

ftp> put Lincoln.java
200 PORT command successful.
150 Opening ASCII mode data connection for Lincoln.java.
226 Transfer complete.
652 bytes sent in 0.00272 seconds (2.3e+02 Kbytes/sec)

You can use the dir command to list your remote directory (in this case, csci/201/FTPdemo) and the quit command to end your ftp session.

ftp> dir
227 Entering Passive Mode (152,18,69,7,177,122)
150 Opening ASCII mode data connection for /bin/ls.
total 2
-rw-rw-rw-   1 bruce    csci201      632 Aug 10 14:42 Lincoln.java
226 Transfer complete.
ftp> quit

FTP is not intended to be used for coping files across directories on the same machine; but, because we have done that in this case, we can verify that the file transfer worked using the ls -R command mentioned earlier. Please do that now.

More information regarding FTP commands can be found on the following link.

Running Java in a command session

We're going to run Java the old fashioned way.

We'll be using Sun's J2SDK, Java 2 Software Development Kit, in CSCI 201. You'll find a copy of the J2SDK on the CD-ROM distributed with your textbook. It can also be downloaded from Sun's Java Technology page.

We want everyone to be using version 1.4.2 of the Standard Edition (J2SE) of the Java Software Development Kit. Determine your version by typing the command "java -version". You should see something similar to the following output even if you are running Windows at home.

[user@mach dir] java -version
java version "1.4.2"
Java(TM) 2 Runtime Environment, Standard Edition (build 1.4.2)
Java HotSpot(TM) Client VM (build 1.4.2, mixed mode)

If your version is not 1.4.2 or greater, or if you do not have the SDK, you need a new J2SDK install. To get it, go here, find the section: Download J2SE v 1.4.2, click on the SDK download link next to the operating system you are running, and follow the instructions on the resulting pages. We recommend not entering in your personal information when it asks you for it (just click No Thanks).

Suppose if you have installed the J2SDK on your home Windows computer and get the following message:

C:\>java
'java' is not recognized as an internal or external command,
operable program or batch file.

If this happens you need to consult Sun's installation instructions for Windows to find out how to set the path "permanently".

Your Assignment ...
Instructor Checkoff ...

You're now finished and can go home, don't bother your lab instructor.

Resources