CSCI 107 Lab 11, Creating a Slide Presentation using COREL
Presentations
Studies have shown that "We remember only 10% of what we hear, and 50% of
what we see" In this lab you will learn techniques for creating a
computerized slide presentation to help us remember more of what we hear and
see. It is to be noted that slide presentation is not meant to replace you as
a speaker, but is to be used as a tool to enhance your spoken presentation.
We will follow the outline below.
- Your instructor sill give a brief demonstration of a presentation using
some of the techniques you will be learning in this lab.
- Your instructor will briefly explain how the presentation was created.
- Using the single slide, outline, slide list, or slide sorter views
- Choosing templates, changing fonts, point sizes, text colors
- Adding bullets, graphics, shapes
- Creating transitions and overlays
- Running your slide show
- The remainder of this handout will guide you through some steps to create
a short presentation.
- You will create your own slide presentation that will be shown to the
class at the begining of the next lab class.
Creating a short presentation using a Wizard and template
Corel as well as many of the other presentation applications have
templates that help you quickly and easily organise your thoughts. We will
use a Wizard and one of these preformed templates to create this first set of
slides.
- Go to Start, Programs, COREL Wordperfect Suite, COREL
Presentations
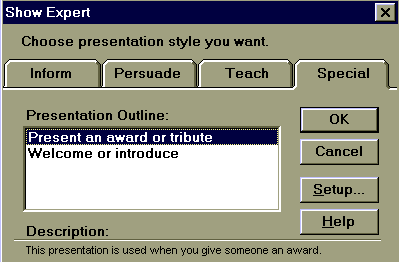
- Select Create a Slide Show Using Show Expert, OK
- Click Gallery, scroll through the backgrounds, select the
background that you want to have for all your slides, then click
Retrieve
- For now we will accept the Title template for the slides. Notice that
each slide has three layers: a background, template and the slide. Click
OK to continue and display the template options below.

- Click on each of the four tabs to see the various template options
available, then select the Teach tab, then the Teach a skill
OK
- There are four different ways of viewing your slides, which is explained
in the wizard at the right. click each of the view buttons either in the
Expert window at the right or on the far left side of the screen.

- Return to the Outline view. This outline operates similar to the outline
we discussed in WordPerfect. If your blinking cursor is at the begining of
any sentence, Pressing the Tab key will put you down a level, while Shift Tab
will put you Up a level. The Highest level is a new slide. Pressing the ENTER
key at the end of a line creates a new line at the same level.The template
prompts you to replace their titles and text with your own.
- In the first slide title, replace Teach a skill with Preparing
a Slide Presentation
- In slide 2, change the title to SKILLS TO BE LEARNED and three
text lines to be
- Using the Wizard to create the clides
- Creating transitions between slides
- Adding graphics
- To save time we will not change the text of the remaining slides. You get
the idea :)
- Change to the Slide view. Notice that the bulleted lines in all
the slides are Center Justified. We must change the template by doing the
following
- From the top menu select Slides, Edit layouts.
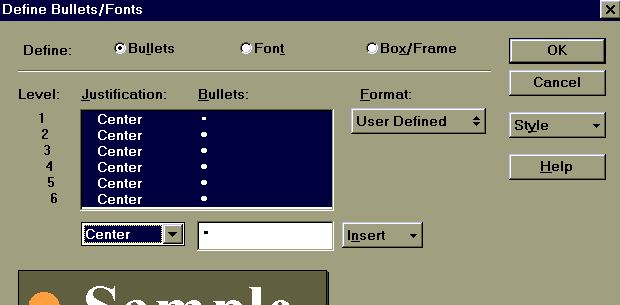
- Right click in the bulleted area, then select Define Bullets/Fonts
to display the following

- In Define, click Bullets and in Level, drag down through all the
levels and below the selection chose Left rather than Center or
None. OK
- Return to editing the slides by selecting the menu option Layouts,
Edit slides
Creating Transitions Between Slides
In this section we will make the changes between each slide more
interesting. For practice, we will make a different transition between each
slide, but it is usually better to have a consistent transition. Too much
glizt can sometimes DETRACT rather than ENHANCE your talk.
- Be sure you are in the Slide Sorter view
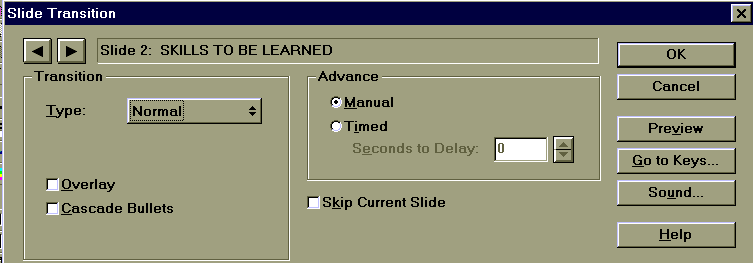
- Right click on slide 2 and select Transition from the popup menu
to display the dialog box below.

- Select something other than Normal from the Type and select
Cascade Bullets then click OK.
- In a similar manner, create a different transition for each of the other
slides.
- To run the slide show to see the transitions, select the menu option
Slide, Play Slide Show and be sure to start at slide 1.
- Left click displays the next slide
- Right click displays the previous slide
- Escape button returns to the edit mode
Insert graphic images
Graphic images can be inserted anywhere on the slide. These images can be
clip art, scanned pictures or shapes. Presentation software usually comes
with many premade images.
- Select slide 1 and select the Slide Editor View
- From the main menu, select Insert, Quick Art, then drag a box on
the slide where you want the graphic
- Select the 17. People category, then the 4 Discuss graphic
image.
- To move or resize the graphic, select the pointer tool (arrow) in the
upper left corner of the screen then drag/resize the graphic. Hint Dragging
by a corner will not distort the graphic.
- Graphic shapes can be used with text. the graphic tools to the left are
similar to those that we used in the other graphic applications.
- Select slide 2
- point to and hold the left button down on the shape tool and select the
circle
- Drag it in place on the slide
- point to and hold the left button down on the Text tool (big A) and
select the second A (no background)
- type in Howdy then move/resize the text on top of the circle.
- Practice putting other shapes or images on to other slides.
- Save this presentation as claspres on to your floppy and turn the disk in
at the end of class.
Create your own presentation
Create no more than a 6 slide presentation of anything you want. Sell a
product, Introduce yourself, Describe an event or something similar. Be
creative. Each of you will give your presentation in front of the class at
the begining of the next lab period.


