UNCA CSCI 107 Lab 3 --- Graphics
In today's lab you will learn to work with two graphics programs:
FreeHand 7.0 and xRes 3. You will use these programs to create a
picture that you can display on the web page. You will use FreeHand to create
a background graphics image. Then you'll use xRes to select a "real" object
from a photographic image and place it on top of your background. You'll FTP
this image to bulldog and place it within your home page.
With practice, you can become an expert at both FreeHand and xRes.
However, don't expect fantastic results today. Don't spend hours fussing over
your results during the lab. You can come back later and perfect your
artwork.
Section 1: Creating Graphics in FreeHand
Use the Windows 95 Start button to begin FreeHand. You should find it in
the Macromedia applications group. Close all sub-windows associated with the
application, with the exception of the toolbox which cannot be
resized or closed. Select New from the File menu, or
File/New as we'll often say from here on, to open a new document. We
will now create a graphical image while we learn to use some of the features
offered in FreeHand.
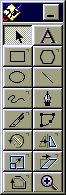
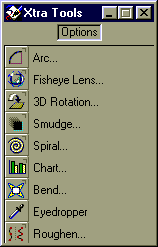
The Toolbox
- The toolbox contains 16 tools used to draw, edit, or view the document.
Position the mouse over each tool to display a message that describes it. You
can double-click tools that have a bracket in the upper, right corner to open
a dialog box and make custom settings for that tool.
- Practice drawing: rectangles and squares using the rectangle tool,
polygons and stars using the polygon tool, ellipses and circles using the
ellipse tool, and straight lines using the line tool. Be sure that all
objects are contained in the space of the document.
- The arrow tool can be used to select objects that you have already drawn.
Selected objects appear blue. A selected object can be moved by dragging it
to a new location or deleted by selecting Cut form the Edit menu
(they can also be copied and pasted in other locations). A menu of commands
for working with the selected object is produced by clicking the right mouse
button. Select an object using the arrow tool and look at the pop-up menu
produced by clicking the right mouse button. Try using the arrow tool to
select and move or delete objects.
- Free-form lines can be drawn using any one of three tools: (1) the
freehand tool, (2) the pen tool, and (3) the bezigon tool. Each draws
straight lines and arcs by placing curve, corner, and connector points. The
kind of points used in each line can be changed using the object inspector;
we will look at the object inspector later.
- Select an object that you have already drawn and try using the: rotate,
reflect, scale, skew and trace tools with that object. Ask for help if you
have trouble using these tools.
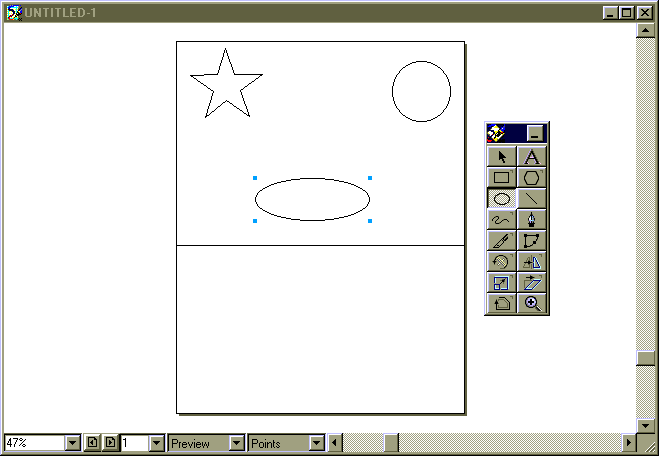
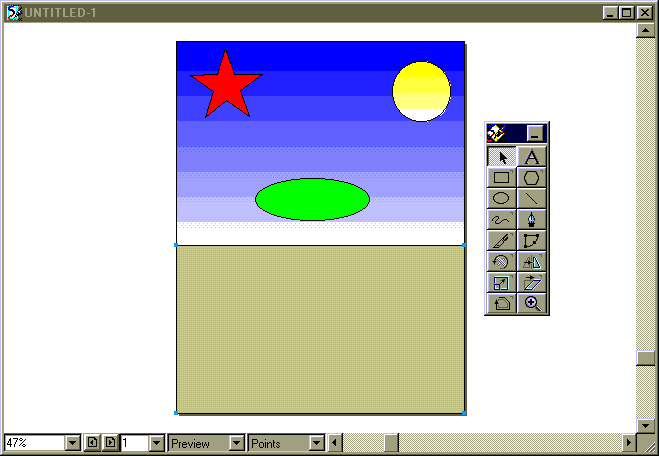
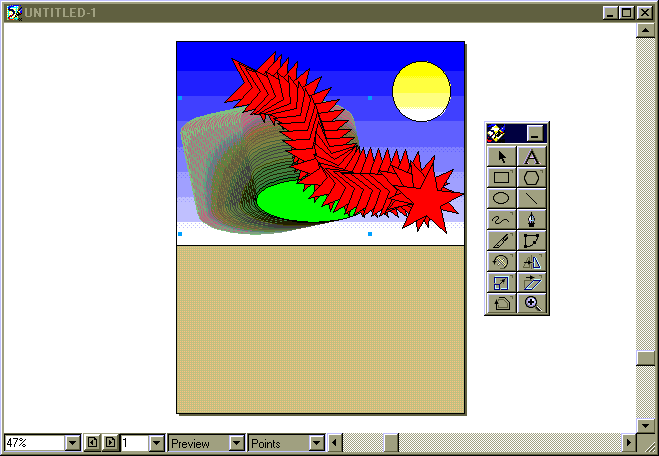
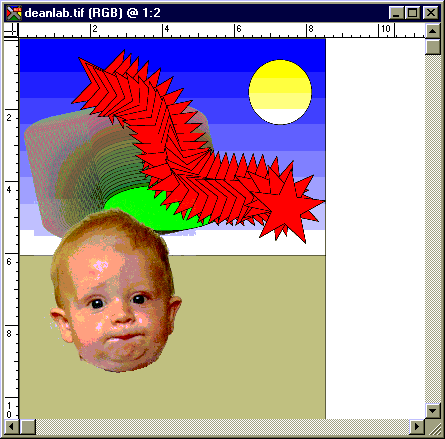
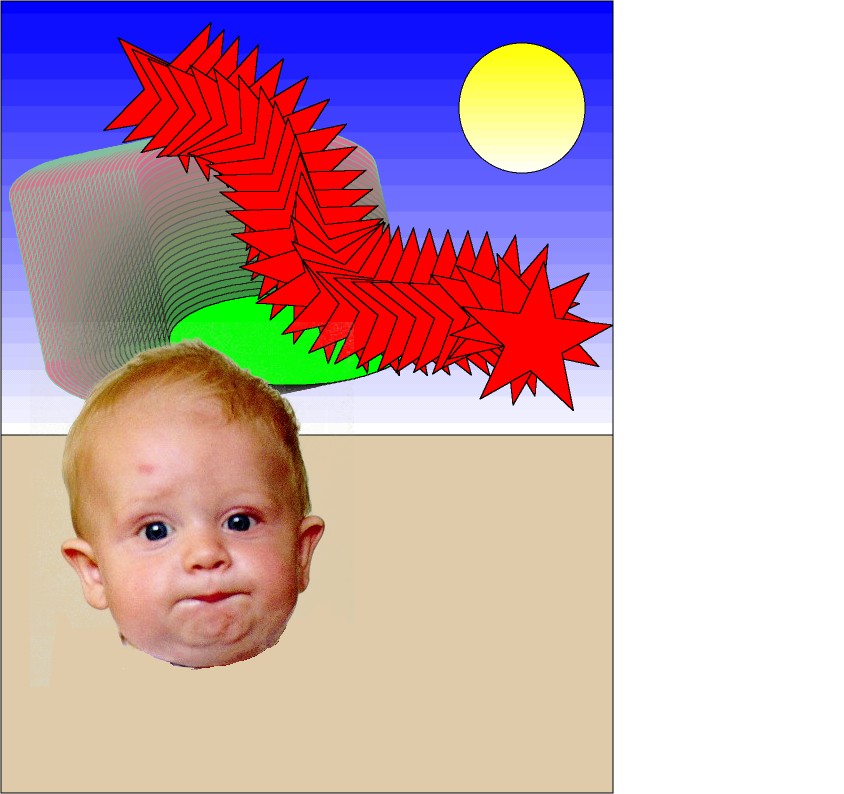
- Now that you can use each tool, it is time to make a picture. Clear the
document by selecting: Select/All and Cut from the Edit
menu. Now draw a large rectangle filling the bottom half of the document and
a second large rectangle filling the top half of the document. Draw the
following objects in the upper rectangle:
- a circle in the upper right-hand corner
- a star in the upper left-hand corner
- an ellipse in the center at the bottom
The Object Inspector
- We will use the object inspector to help complete our drawing. Under the
Window menu, select Inspectors/Object to open the object inspector
window.
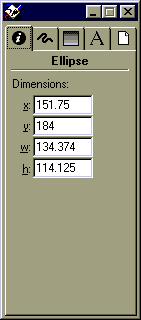
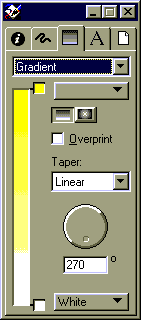
- Select the circle you have drawn in the upper-right hand corner of your
document. In the object inspector window select the fill tab. From the
drop-down menu, select Gradient. Double click on the black color
block at the top of the gradient bar to open the Color Mixer Window.
Select the RGB button at the top of the mixer window and position the slides
under R, G and B to produce a yellow color in the color
bar at the bottom of the color mixer window.
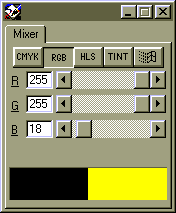
Drag color from the yellow bar and drop it in the color block at the top of
the gradient bar. This will fill the circular object that you have drawn with
a yellow gradient.
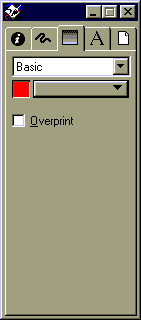
- Select the star that you have drawn and then select the fill tab in the
object inspector window. Select Basic from the drop-down menu. Use
the procedure described above to fill the star with a red color. Use a
similar procedure to make the ellipse at the center of the top rectangle
green.
- Using a similar procedure fill the top rectangle with a blue gradient and
the bottom rectangle with a solid sand color (select Basic from the
drop-down menu to produce a solid color). Close the object inspector and the
color mixer windows.
Combining Objects
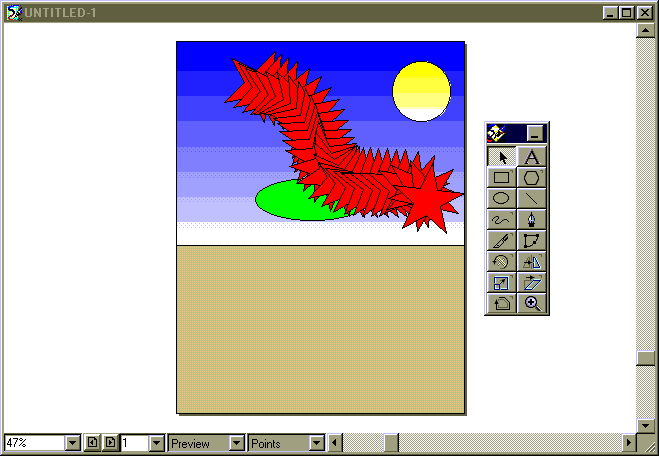
Now we'll combine three objects to make a new object.
- Select the star you have drawn and then select Duplicate from
the Edit menu
- Holding the shift key down, select both stars, the one you drew and the
new duplicate
- Under the Modify menu, select Combine/Blend to produce a blend
of the two stars
- Create an arch somewhere in the upper rectangle using the freehand tool
(represented with a squiggly line)
- Holding the shift key down, select the star blend and the arch just
created
- Under the Modify menu, select Combine/Join Blend to path to
produce a blend along the arch path.
Xtra Tools
- Under the Window menu, select Xtra/Xtra Tools to open the Xtra
tools window.
- Under the Window menu, select Panels/Color Mixer to open the
color mixer window.
- Select the ellipse you have drawn in the center of the upper
rectangle.
- Double click on the smudge tool in the Xtra tool window to open the
smudge dialog box.
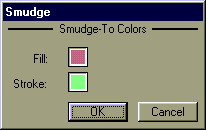
- Fill both the Fill and Stroke color blocks with colors
of your choice using the color mixer window as described above and then
select the ok button in the smudge dialog box.
- Drag the ellipse you have selected to create a smudge.
Exporting a File
- Under the File menu select Export. Under Save as type
select TIFF. Save the file with a name of your choice on the desktop.
- If you want to save a copy of your file to your diskette, save your image in JPEG format. TIFF requires too
much room for a diskette.
- You may use this file in the next section or create a new picture of your
choosing.
Exiting
- Select File/Exit. Do not save your file. You've already exported
it.
Section 2: Selecting a photographic image to place on your
background.
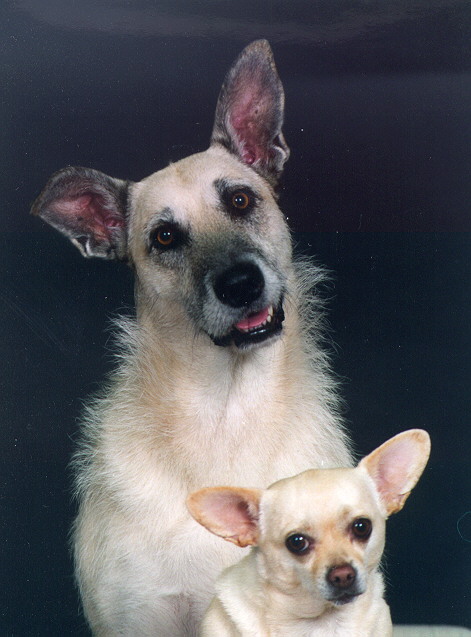
You now need to find a JPEG image to use in Section 3. The image should
contain one interesting object in front of a very plain background. We
suggest you use one of the following two images.

However, if you wish you can quickly go out on the Internet and find another
image using Netscape.
One you've located a page with a suitable image, move your mouse over the
image and click on the right button. You should see a menu that contains the
choice "Save Image As...". Click on this entry and save your image
onto your diskette.
Section 3: Placing your image onto a background
It's easy to simply place an entire JPEG image on top of a background
produced by FreeHand. However, that's rather boring. We're going to use xRes
to select out an interesting part of a JPEG image and place that on the
background!
- First, start xRes (i.e., under the Start button menu select
Macromedia applications/Macromedia xRes 3).
- Use File/Open to read in the JPEG file you are using for this
section of the lab.
- Take a good look at the tools palette. We'll only be using a few of the
tools in this lab. However, you can use the help facility of xRes to find out
more about the others.

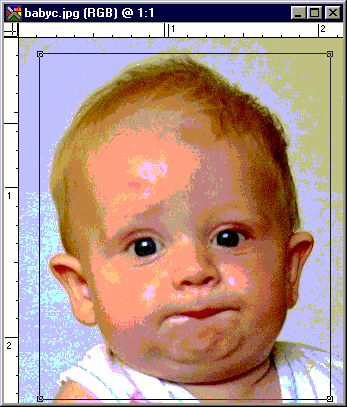
- Remember, the object is to select out the interesting
feature of the picture. In our example, we're going to select the
baby face.
- Begin the selection process by using the Crop tool to place a tight
rectangle around the interesting feature. Press the mouse
within the image and drag the mouse to create a rectangle that surrounds the
interesting feature. Once you've placed the rectangle, you
can resize it at the corners with the mouse. When you move inside the
rectangle, notice how the cursor turns into a hammer. When you are satisfied
that you have a good tight cropping, move inside the rectangle and press the
mouse.
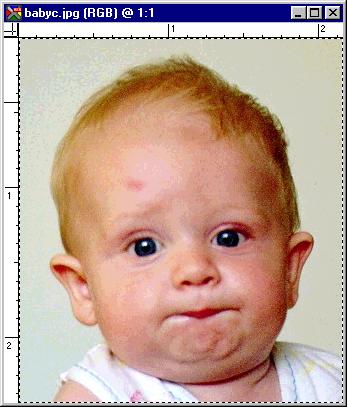
- Our next task is to really reduce the image down to the
interesting feature. This is the hard part! Start
by selecting the entire image with Select/All.
- Go into the tool pallet and select the Wand tool. Move into the image
and, while holding down the control key, press the mouse within an
uninteresting area. The xRes program will find a contiguous area of the image
with a similar color and de-select it from the image. (This is the reason why
you wanted an image with an uninteresting background). The area that remains
slected will be surrounded by "marching ants."
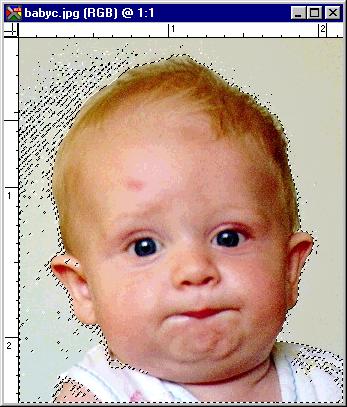
- Unfortunately, it is quite unlikely that only the interesting
feature will be selected with one wave of the Wand. You'll
undoubtedly need to remove more from your selection. Continue to hold down
the control key while pressing outside the interesting
feature.
By the way, if you want to add to your selection, hold down the shift key
when you press the mouse. You should only do this inside the
interesting feature.
- Perhaps, you'll be lucky or skillful with the Wand tool and be able to
round up all bits of the interesting feature. However, if
you aren't (and we expect you won't), you'll need to use another tool, the
Lasso tool. Select the Lasso tool from the tool pallet. To de-select more,
trace loops outside of the interesting feature while holding
down the control key. To select more, trace loops inside the
interesting feature while holding down the shift key. Don't
worry about getting it perfect today. After a few month's practice, you'll be
an expert.
Let's assume you eventually get it right.
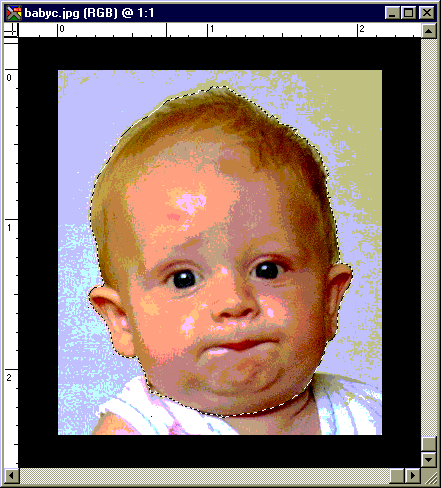
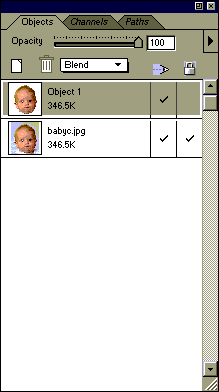
- Now you must float your selection into the object panel. Use
Select/Float from the menu. You should now see your selection in the
object. All you have to do is move this object into your background.
- Use File/Open to read your FreeHand output into xRes. Try to
arrange the two images so that they do not overlap. Select the object
from the object window containing your interesting feature and drag
it into your background drawing. Left up the mouse. Exclaim joy.
- Use File/Export to save your
image in JPEG format on your diskette. Retreat with
File/Exit.
Section 4: Onto the net
- Use FTP, just as you did in Lab 2, to copy
your image into your public_html/csci107 directory on
bulldog.unca.edu. Call your image lab3.jpg, so that
your lab instructor will be able to find it.
- Check your work by loading
http://www.unca.edu/~USERID/csci107/lab3.jpg in
Netscape.
Return to CSCI 107 labs page
Return to CSCI 107.001 lecture page
Return to CSCI 107.002
lecture page
 Return to the UNCA Computer Science home page