CSCI 235 & 182 — Arduino starting with Tinkercad Circuits
What you do with an Arudino (and a computer)
Arduino
Hardware
Getting started with Tinkercad Circuits
Things to do
- Using a simulated Arduino
- Add Arduino Uno R3
- Bring up code editor
- Upload & Run
- Change time LED is high to 0.2 secs
- Get out of block programming mode
- Do real C: Add definition for
LEDPIN
(as const int) and modify looploop()
- Adding a breadboard
- In
+ components add a small breadkboard
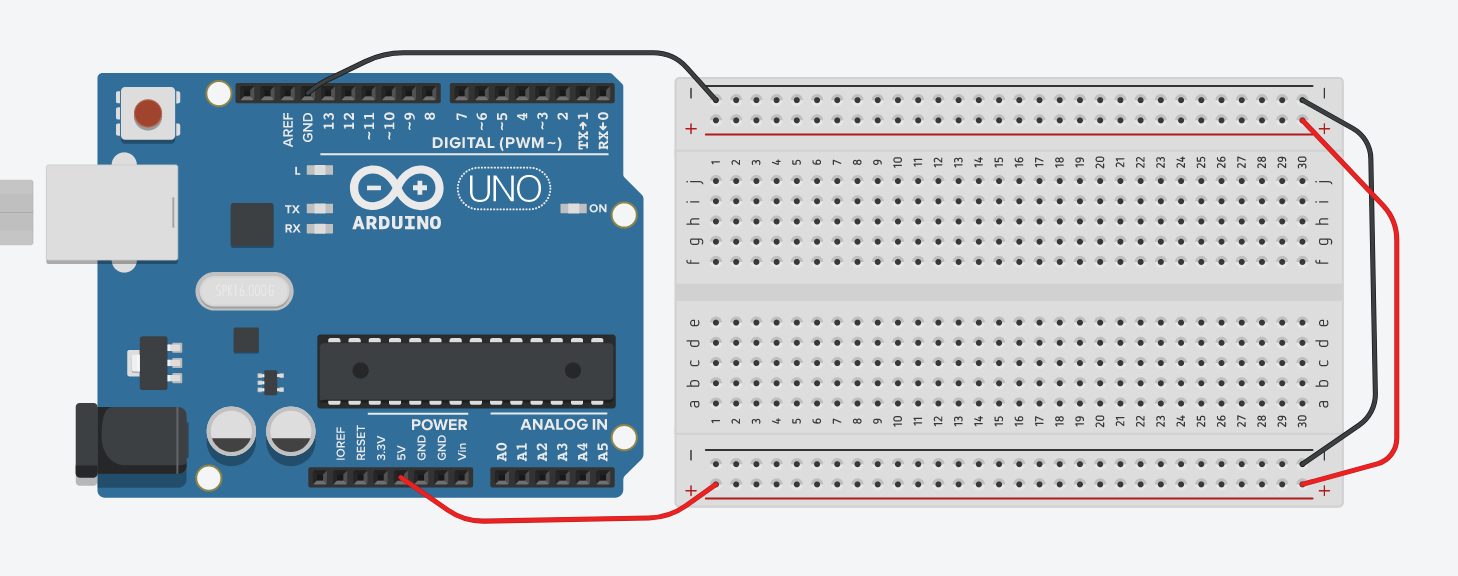
- Wire exactly as shown above. Use the same colors for wire.
- Make sure you have no short circuits!
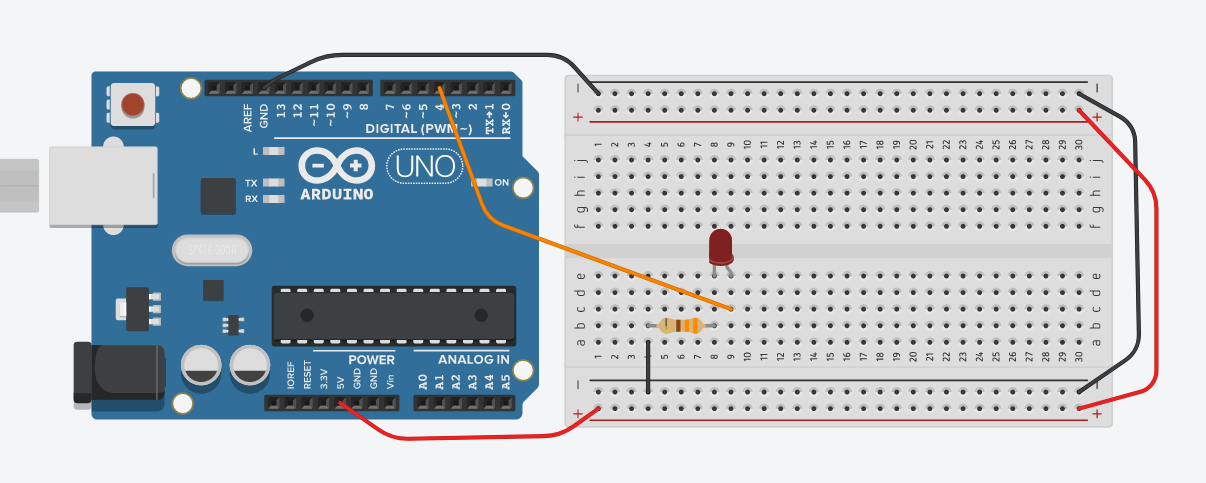
- Adding an LED
- In
+ components add a 330 Ω resistor and
an LED.
- Wire them into Pin 4. Be sure the
cathode of the LED is
connected to ground.
- Simulate
- Adding a switch
- Use pin 2.
- Pushbutton switches (aka tactile button switches) are tricky.
Be sure you have them oriented corrected.
Also, if you step on them, throw them away.

- Modify Arduino program to use Pin 2. Use
pinMode() to enable the internal
pullup.
- Using
digitalRead() to read Pin 2.
- When the button is switched, light up the LED.
- Adding a speaker
- Replace the LED with a Piezoelectric buzzer.
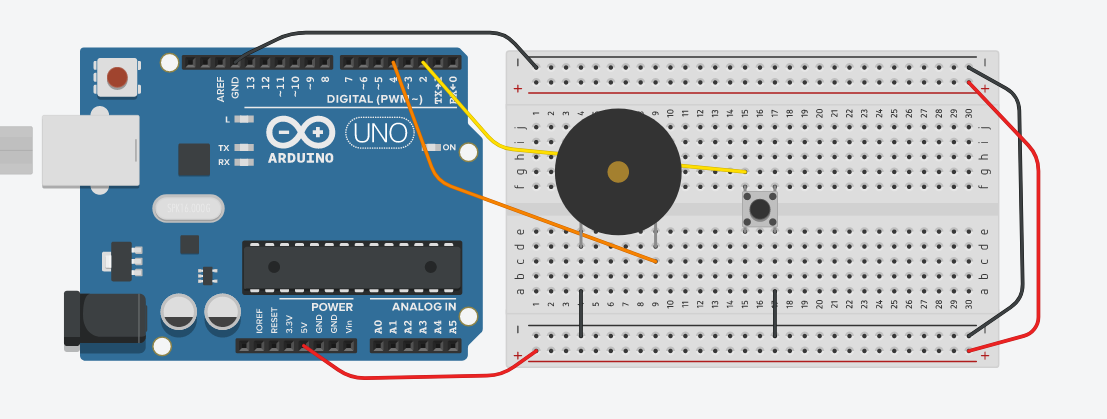
- If you turn the Piezo off and on quickly, it will make a tone.
Unfortunately, sound is not enabled on the computers in the lab.
- If time permits
- Make a stop light
- Make a button that flashing a LED
- Make a button that flashing a LED for 60 seconds after a button is pressed