Two part cleansing
Removing the old NetBeans configuration
In your home directory, there is a "hidden" subdirectory name .netbeans which contains information about previous NetBeans projects you have opened. Deleting this directory does not delete your old projects; however, it prevent NetBeans from searching them when it is started.
To delete this directory, start up a terminal window by right-clicking on any unoccupied space of the desktop and then choosing New Terminal.
In the new terminal, while connected to your home directory, type the command:
[yourid@yourmach yourid] rm -rf .netbeans
Be prepared to wait a little longer during your next start up NetBeans, while information regarding the Java system is re-created.
Using NetBeans Beta 2
At the beginning of the semester, only Beta 1 of NetBeans was available. Now there is a Beta 2 version. In some instances, lab problems have disappeared when the Beta 2 version is used.
If you are starting NetBeans by typing the command netbeans in a terminal windows, you are already using Beta 2.
If you are starting NetBeans by using the launcher you created in the Introduction to NetBeans lab, you are still using Beta 1. In this case, you should modify your launcher to use Beta 2.
Start up right-clicking on the NetBeans icon
 in the panel
at the bottom of your window.
Select Properties from the menu.
in the panel
at the bottom of your window.
Select Properties from the menu.
This should bring up a Launcher Properties
window. the Command field, change the command file name to
/opt/netbeans-4.0beta2/bin/netbeans.
That's a single character change.
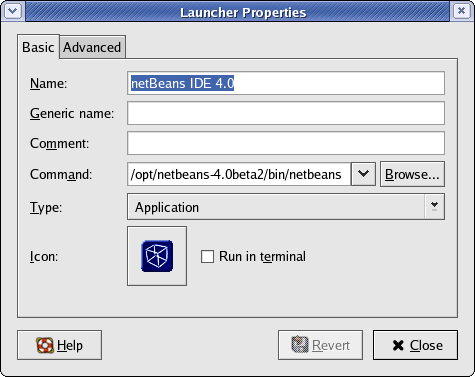
You may then Close the Launcher Properties window.