Regardless of the country where you are presenting a gift to a host or busness associate, there are some general guidelines regarding international gift giving.
Flowers are acceptable in most cultures, but in many countries you should avoid red roses because they signify romantic intrest. Also, in most European countries, white flowers and chrysanthenums are given only for condolences or sympathy. Avoid giving an even number of flowers, and unwrap the flowers before presenting them to the recipient.
Chocolates or gifts of candy are usually appropriate. Be careful not to give candy manufactured in a rival country.
Gifts with company logos are usually acceptable, providing the logo is small and unobtrusive. In some countries, caps and T-shirts with logos are considered souvenirs, not gifts.
- Word: double click anywhere on the word.
- Paragraph: triple click anywhere in the paragraph.
- Line: Click in the margin left of the line.
- Several lines: Drag down in the left margin of the lines desired.
- Any block of text: Drag mouse over the text.
- Deselect any selected text by clicking anywhere on the screen.
- CTRL <- or CTRL -> One Word to the left or right
- HOME or END Far left or far right of current line.
- PageUp or PageDown Top or bottom of current screen
- CTRL-HOME or CTRL-END Top or Bottom of Document
- Place a footnote at the end of the first paragraph.
- Click in the second paragraph and full justify the text.
- (If the ruler bar is not showing, select View, Ruler) In formal
papers, long quotes are usually indented on both margins. To do this, click
anywhere in the paragraph, then on the ruler bar, drag the left margin marker
½" to the right, and the right margin marker to the left
½".

- A whole paragraph can be indented or outdented by use of the icons.
 Click in the third
paragraph and indent the paragraph.
- This first line will appear automatically
- Pressing <Enter> will automatically create the next line in the
same level.
- To change levels, with the insertion bar after the level number, press the <TAB> key to go down a level or <SHIFT-TAB> to go up a level.
- Select View, Normal to turn off the Outline feature.
- Press <CTRL-END> to move the insertion bar to the end of the
document and press <ENTER> twice.
- Now use the outline feature to create the following outline

- To insert a level item, put the insertion bar at the end of the line "This is the first level" and press <ENTER> and type "This has been inserted" Notice that the numbering has been readjusted.
- Now use the outline feature to create the following outline
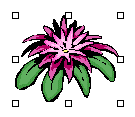
- Select Insert, Picture, Clip Art and select Nature and one
of the flowers.

- Point to one of the corner handles until the double (45 degree angle) arrow appears, then reduce the size of the image (to about 1 inch square) by dragging a corner handle. Notice that there is no distortion if the corner handles are used to drag. The aspect ratio IS changed if any of the side handles are used to resize.
- Move the image between the first and second paragraphs by pointing anywhere in the interior of the image and dragging the image.
- To make the text wrap around the image, right click on the image and
select the Format Picture, Wrapping tab, Wrapping style:
Square, Wrap to: Right. Now move the image to look like
the following:

- Create a 3 column, 3 row table by selecting, the Table, Insert
Table or clicking the Table icon
 and dragging over 3 columns and down 3 rows then
clicking once in the last selected square.
 - With the insertion bar in the first cell, move forward to the next cell with the <TAB> and backward with the <SHIFT-TAB> (the tab feature to align text within the cells is disabled)
- Select the cells in the first row by dragging across the three cells,
then right click anywhere in the selected region and chose Merge Cells
to create a one cell row.
- Click on the center text icon in the tool bar, then type Student Data in the first row
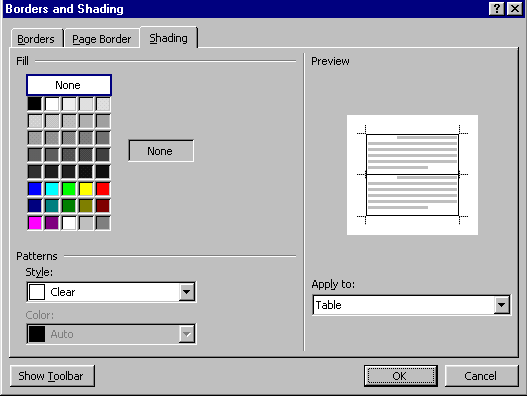
- To shade the cell, right click in the cell and select Borders and
Shading, Shading tab. Then select a shade or color and change the
Apply to from Table to Cell.

- Increase the width of the first column by pointing between the cells
until the double arrow appears, then drag to the right about ½". Your
table should look similar to the one below.

- Type in your name and address in the second row, first cell. Notice that the cell expands as new rows are needed.
- Put your e-mail address in the second column and in the third column a short paragraph describing yourself
- Create some fictitious person for the second row data.

- To create a Header and/or Footer, select View, Header and Footer and in the Header area, type your name on the first line, press <ENTER> and select the Insert Date icon on the Header/Footer toolbar.(point to each icon, without clicking, until the Insert Date message appears)
- Select both lines and click the Align Right icon in the main toolbar
- To create the footer, click on the Switch between header and footer icon and type just the word Page when the message X of Y appears, press <ENTER>. The page counter and the total page counter are both automatically entered. Page 1 or 6, Page 2 of 6, etc will show on the bottom of each page. Select the text and Center Align.
- Close the Header and Footer tool bar. To view the header and footer in the document, select View, Page Layout