This is my fourth generation of handlebar mounts for my digital cameras. I've used a digital camera mounted on my touring bike's handlebars for the last six years. My first good digital camera, an Agfa 1280, was designed with an LCD monitor on the top of the camera body and a lens assembly that rotated through 180 degrees. I mounted the camera, with velcro straps, to a padded platform which I mounted to my handlebar. I could the use the display while riding to compose images.
When I wanted to replace that camera with a higher resolution camera - 3 Mega Pixel Casio QV- 3000 - I took a different approach. I got a conventional digital camera with a wide angle lens - 30 mm 35 mm equivalent - and learned to compose my images without being able to use the viewfinder or LCD monitor. Starting with a 3 MP image allowed me to use only a part of the original image when creating an images for use on my website.
I made two different, but similar, mounts for that camera. The first was, literally, ripped off on a return flight from Europe. Both mounted the camera upright on a platform mounted to my handlebar. The front of the camera was held in place by inserting its lens into a protective lens shade / filter holder I made from a plumbing pipe connector.

A piece of bent coat hanger wire glued to the lens shade and to the platform held things in place and the other ends of that wire came up behind the camera to keep it from coming out of the lens shade. This worked pretty well, but the camera was not held in place well enough to survive a crash or even a really rough road, so I also used the wrist strap to tether the camera to my handlebar bag. That camera survived two actual crashes and three other incidents where the riderless bike fell (or in one case was blown) over. In each case the camera came out of its mount and struck the pavement, but the impact was reduced by the tether.
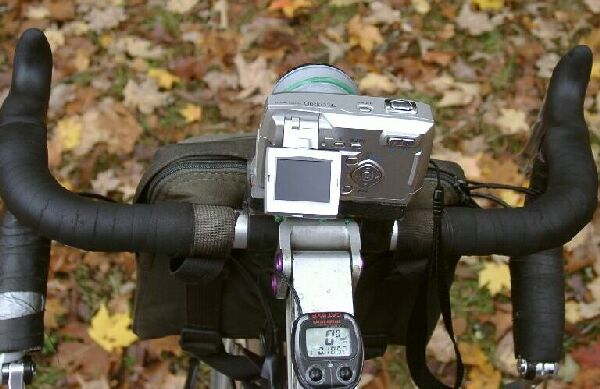
This fall (2003) I got a new, much smaller 3 MP camera. This camera (Pentax Optio 33L) has the same, conventional design as the Casio, but the LCD monitor swivels out from the camera body so that, as with the Agfa, I can compose while riding. It is smaller and lighter than the Casio and, using the same basic mount design, I have come up with a mount that should keep it in place even on rough roads. I'll still use the wrist strap as a tether, just in case...
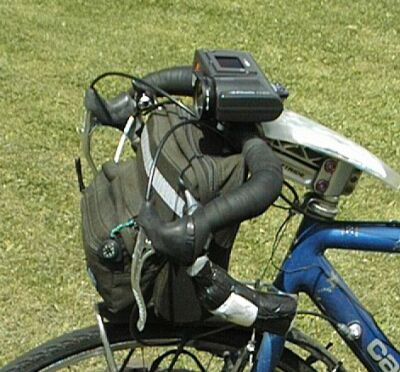
The Cockpit View

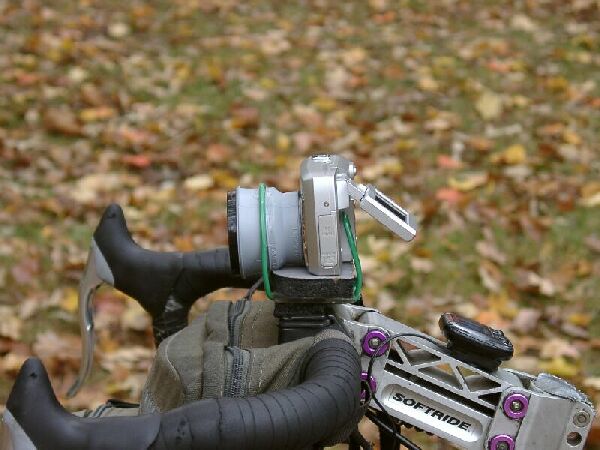
The Front View
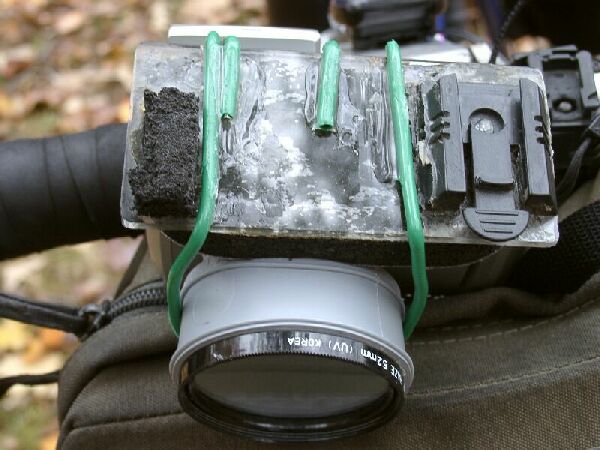
The Rear Bottom of the Mount
I use the same platform I used for the last version of the Casio mount. Since the first version of that mount was ripped off, I made this one easily removable. It mounts using the mounting bracket from an old headlight. The other side is supported by foam rubber that is rests on my current headlight mount on the other side of the handlebars. The green wire is cut from a coat hanger and Goop is used to hold all the parts together. The camera sits on a piece of thick foam rubber. The wire loop comes up behind the camera into the space where the LCD monitor can rest against the camera body.
The Front Bottom of the Mount
The gray 'lens shade' is part of a 1 1/4" to 1 1/2" pipe connector. I could have used a 1 1/4" to 1 1/4" but I already had a filter which fit the 1 1/2" size, so I used this adapter. The 1 1/4" end is a tight fit on the part of the camera body that protrudes around the lens. The adapter is fexible and a bit stretchy, and it holds the camera body firmly. The lens shade, in addition to holding the camera in place, also protects the lens from water, dust, and road debris. The most vunerable part of most current digital cameras is the mechanism that entends the lens. My mount design keeps this part of the camera, and the lens itself, in a sealed environment.
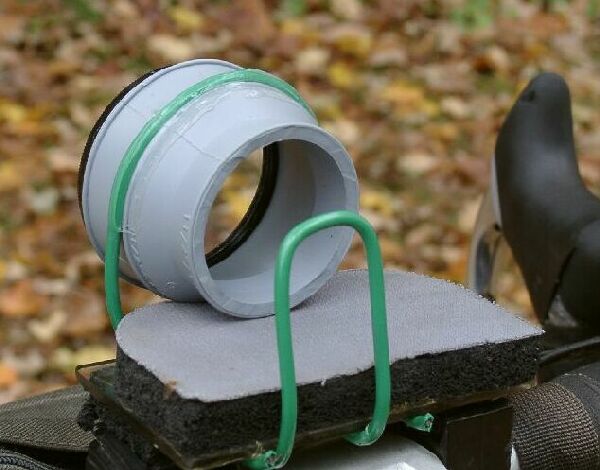
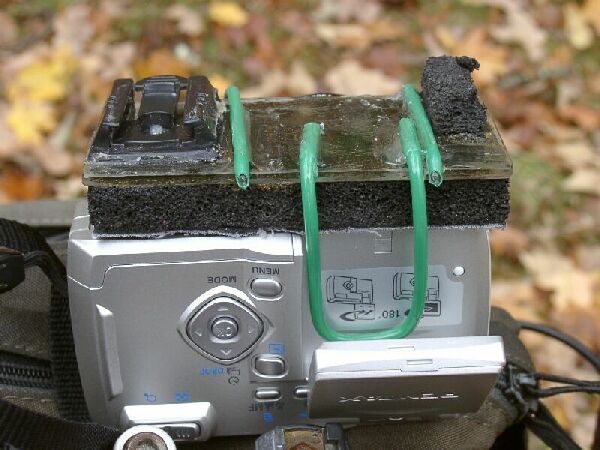
The Empty Mount
The carefully hand bent green wire at the front is Gooped to the plumbing adapter so that the camera, when inserted in the adapter, is held firmly against the foam. The green wire at the back holds the camera against the plumbing adapter. For an even more secure mount, a short piece of pencil - heh, it is what fits in there! - can be inserted between the bottom rear of the camera and the green wire loop to lock the camera in place.